
DIY State Sign
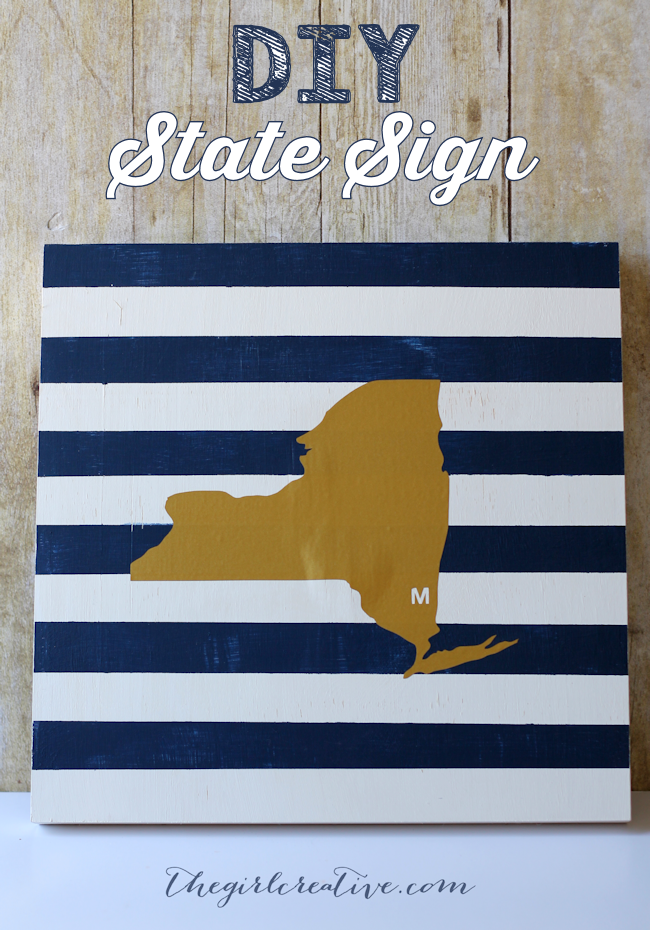
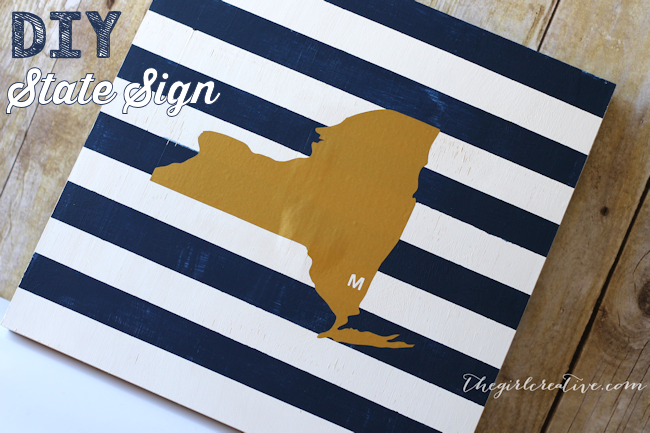
When it comes to home decor style I feel like I have no idea what I’m doing. It took me forever to put anything up on the walls in my house and even now I’m getting tired of how it looks. I have a nice shelf up in my living room that I have fun decorating for the holidays but struggle with creating an everyday look. I see all these beautiful mantels all over blog land and wish I could pull it off. Then one day I had an epiphany. (Maybe that’s not the right word but it sounds smart, doesn’t it?) I’ve lived in New York my whole life. My husband works for the state of New York. New York is sort of in our veins so why not incorporate NY into my home decor. It’s going to be a work in progress but I started with this DIY State Sign.
DIY STATE SIGN SUPPLIES
Darice Wood Board
Painters (or washi) Tape
Craft Paint in 2 Coordinating Colors
Silhouette Vinyl
Silhouette Cameo
Paint Brush
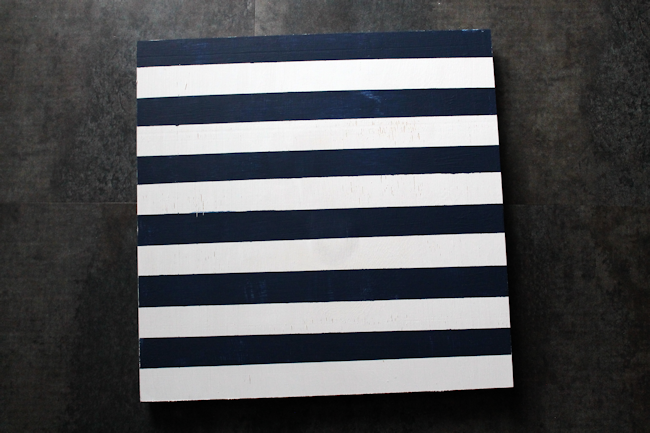
Step One: Give your wood board 1-2 coats of paint. Since I was using white and navy blue paint, I used white first. Allow to dry.
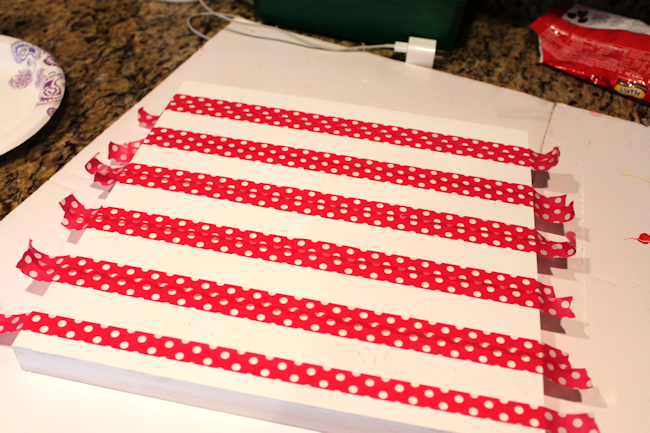
Step Two: Once your board is dry, decide how far apart your want your stripes to be and tape off with painters tape or washi tape. I was too lazy to dig around the garage and basement for my painters tape so I used washi tape and it worked fine. I did two rows of tape together because I wanted wider stripes. Once I had my board taped off I gave it a nice thick coat of my navy blue paint.

Step Three: Remove tape. I didn’t wait until my paint was dry before I removed the tape. I think I read somewhere that you shouldn’t wait until the paint is dry so I didn’t. It worked out fine for me.
Now, unfortunately I didn’t take photos of the process for creating the state portion of the sign but it was really simple so I will just try to explain it.
Step Four: If you own any of the Silhouette machines then you should have access to their online shop. I absolutely love it because you can buy shapes for just $0.99. I purchased the NY State file and uploaded it to Silhouette’s Design Studio software. I added a little “M” as close to where I thought we lived and then cut it out using Silhouette’s vinyl in gold. I removed the excess vinyl from around my shape and used contact paper in lieu of transfer tape to pick my design up. I centered it as best as I could onto my striped board and used a credit card to smooth the design onto my board. I peeled away the contact paper and called it done.
If you are looking for more amazing Silhouette projects, I rounded up 25 Silhouette Projects that will keep you busy for a long time!

SUCH a fun idea! Definitely pinning for later!