
DIY Burlap Ribbon Trees
You will not believe how easy it is to make these DIY Burlap Ribbon Trees out of just a few supplies. They will make a fantastic addition to your rustic farmhouse Christmas mantle.
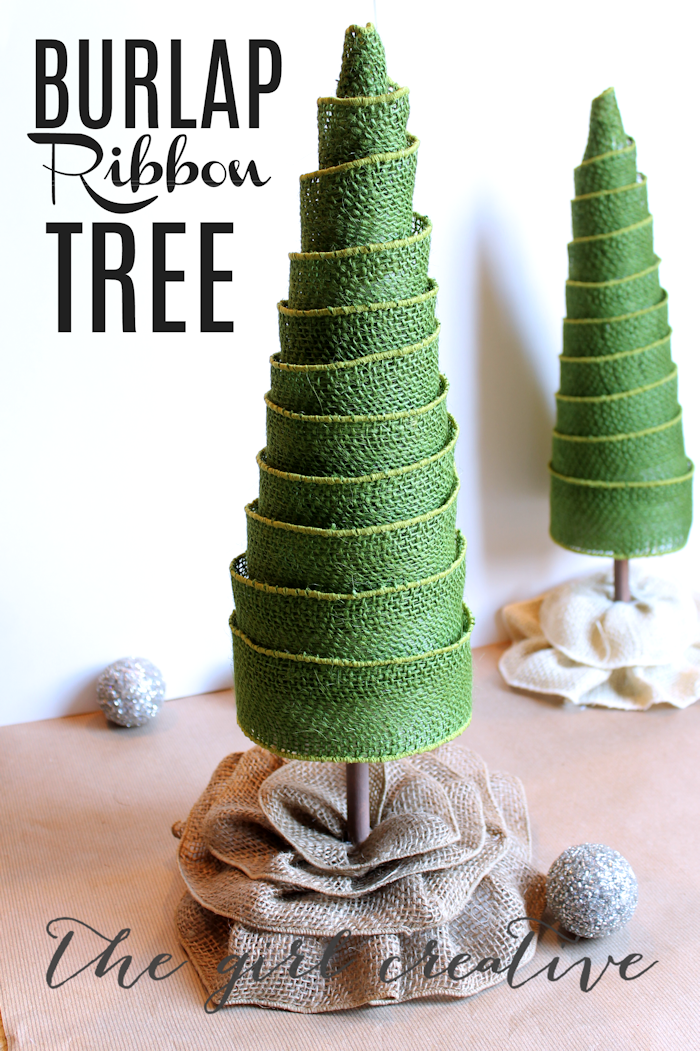
How to Make A Christmas Tree Out of Burlap Ribbon
The Supplies:
Poster board to a Make a Cone
Stryofoam Square Blocks
Burlap Ribbon with Wire
Hot Glue Gun
Wooden Dowel
Tissue Paper
Brown Craft Paint
Pins

BEFORE YOU GET STARTED: Before you get started, paint the wooden dowel brown and set aside to dry. Craft paint dries quickly so it will be ready for you to use in this next step.
HOW TO MAKE A DIY PAPER CONE
Unfortunately I didn’t take progress pictures but I’ll do my best to explain all of the steps. It really is so easy that I’m confident you will not have any issues.
Since I didn’t have the foam cones, I made my own out of poster board as you can see from the supplies photo. I followed a tutorial on YouTube and it was very simple.
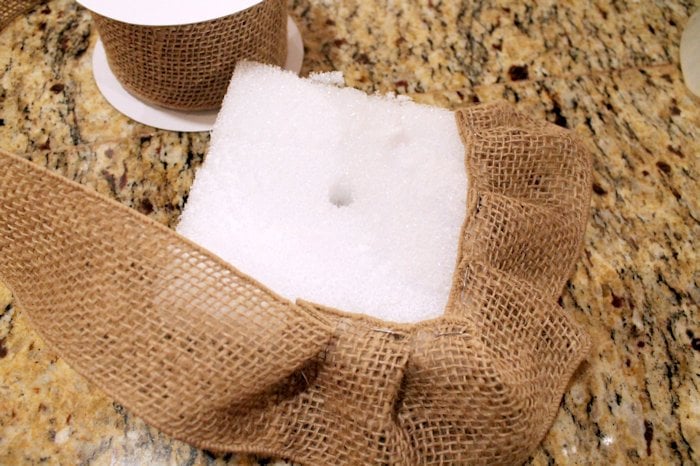
CHRISTMAS TREE BASE
For the base of this tree I used a styrofoam block. You really only need a styrofoam square about an inch and a half to 2 inches thick. I used what I had on hand and cut it down using a styrofoam cutter.
I was worried that the weight of the tree (it’s not heavy at all but I just wasn’t sure how that would work out) would not be supported by the slab but it worked fine. Score!
Take your dowel to make a hole in the center of the styrofoam tree base.
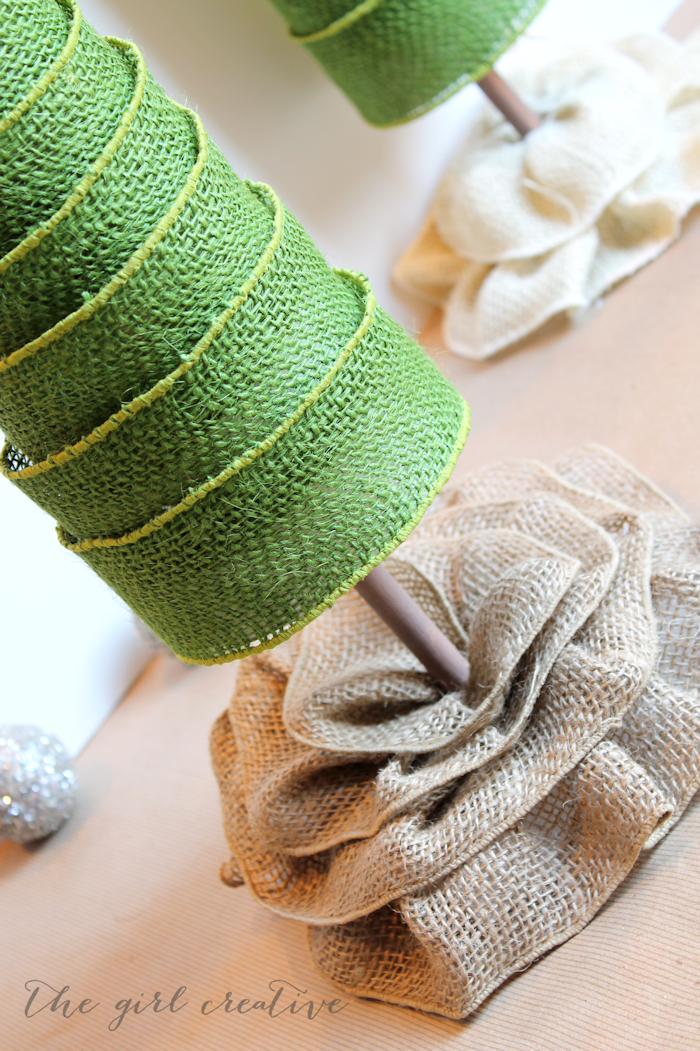
Now that you have your base, it’s time to make the ruffled tree skirt. I pinned the end of the burlap ribbon to the outside of the foam base.
Next I created ruffles by overlapping the ribbon a bit each time as I went around the base. I pinned it in place and just kept going around until I reached the center of the base with only the hole is showing.


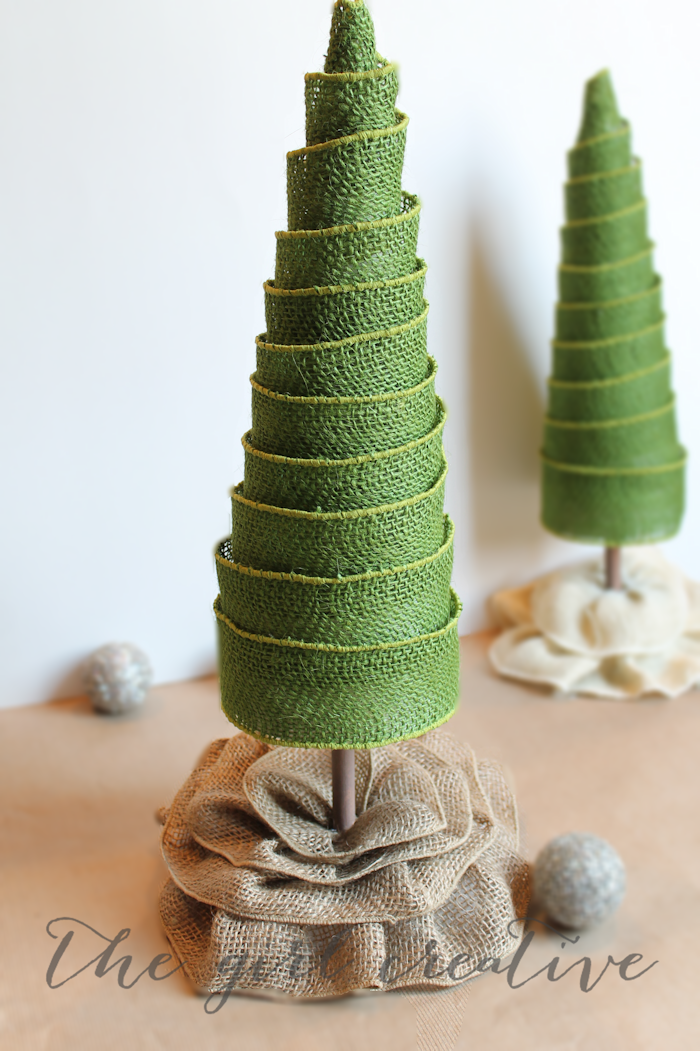
BURLAP CHRISTMAS TREE
Now that your base is done, it’s time to make the tree. Starting at the point of the cone, hot glue the start of the burlap ribbon. You’ll need to fold it a bit so that it wraps at the proper angle.
From there you just loosely wrap the ribbon around the cone. The wire will help the tree take shape. It’s okay of the ribbon hangs a bit and is not snug up against the cone.
Continue doing this until the whole cone is covered. Add hot glue as needed. Snip the the end of the ribbon and hot glue it to secure.
Next hot glue the dowel to the inside of the tree. If you find that your dowels are not long enough (I had this problem) you can just stuff tissue paper inside the cone and play around with it until it looks right to you.
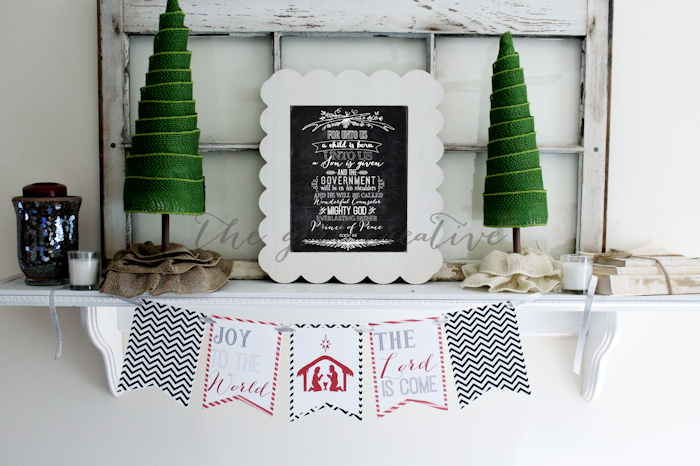
Add your burlap ribbon tree to your base and you’re all set.
I have my trees up on my mantel and but they would look super cute just about anywhere in your house. I chose a high place because my little guy has wandering hands.
I love that there are so many types of Christmas crafts and projects to be done around the holidays. If you’re a Silhouette or Cricut user, you will LOVE these FREE Christmas SVG Files.
If you’re interested in FREE SVGs for all occasions, this is the post for you!
I work at Michaels and always love finding cute crafting ideas I can suggest to our customers. And I will definitely send folks your way…thanks for making my job a little easier.
Awww, thank you so much, Patti!!! You are so sweet! 🙂 XOXO
Adorable Diana- they turned out so well!! Pinning:)
Thanks so much, Krista!! 🙂
Super cute Diana!! I especially love your little tree skirts!
Thank you, Jenn!!! That’s my favorite part too!
These little ribbon trees are so precious! I love that they are simple and classic looking. I also love how you did your mantel. Thanks for sharing with us!
Thank you so much for your sweet words, Amy!!! XOXO
I love love LOVE these!! They are so cute!! Pinning!
Thank you so much, Ashley!!! XO
Your trees are beautiful! The ruffled bases are so pretty. Pinned! Thank you for the tutorial.
Thank you so much! I love how it all came out. 🙂 Thanks so much for the opportunity! XO
These are adorable. I was just looking at a bunch of old craft supplies and I think I have everything I need to do this with a few substitutions. Thanks for the fantastic idea!!!
Send me a picture when you are done. Would love to see it. 🙂
very nice going to give it a try
Wow. That’s really cool. I’m obsessed with Christmas and crafts, so I tend to stumble across a lot of cool crafts. This is hands down one of the more ingenious! How long do you think it took you to do?
Hi Jenny! You can probably pull the whole project off in about 30 minutes if you don’t have interruptions. I was doing mine with a house full of kids (including a crazy 2 year old on the loose) so I did it in stages. It’s really not a hard project at all. 🙂
Thanks for letting me know. I’ll have to see if I find the time. Still have Christmas shopping to do and kids to care for, but I keep stumbling upon all of these brilliant ideas!
Nice work
Question: For the dowels, are they long or short? Since you used paper for the cones, how did you get the dowel to stay in the middle of the “tree”?
Hi Brandy! I actually don’t remember what size dowel I used. I think I bought the dowels and then cut the paper cone down to the size I needed. I started with a big sheet of poster board and cut it down as I needed. I stuffed the paper cone with tissue paper also and hot glued the dowel in there. I *think I did this because the dowel was too short. Ahhh – i can’t remember! lol I hope this helps……..somewhat. 🙂
the whole project off in about 30 minutes if you don’t have interruptions. I was doing mine with a house full of kids (including a crazy 2 year old on the loose) so I did it in stages. It’s really not a hard project at all. 🙂
Agreed. Not a hard DIY at all. 🙂 XO