No Sew Ruffles and a $1 Basket
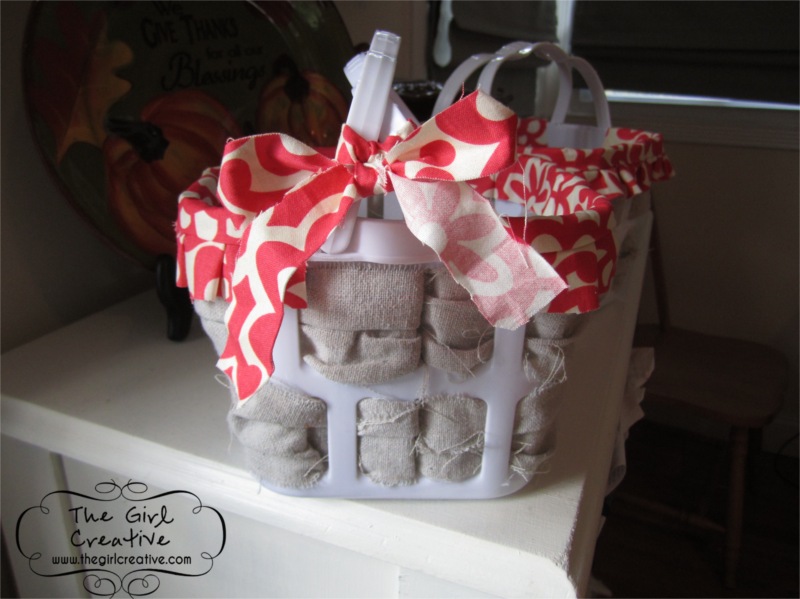
We do not celebrate Halloween in our house and my girls seem to be fine about it as long as they know they will not be jipped on the candy front. I knew I wanted to put candy in a basket for them but I’m not into all of the Halloween-y ones that are out there. I figured it would be a fun project to do if I could find some plain baskets and dress them up a bit.
Enter these $1 baskets from Target.

-
canvas drop cloth strips
-
1 fat quarter of fabric
-
hot glue gun
I started off by weaving the strips of the drop cloth through the baskets and then securing the ends on the inside of the basket with hot glue making the outside look finished.

I contemplated making ruffles with my sewing machine but she’s been a big pain in the butt lately so I decided to use a method that I saw on TLC’s Trading Spaces (I think?? it was a long time ago!). They were using this for curtains and used a staple gun instead of a hot glue gun but I figured the idea would probably be the same.
I took my fat quarter, cut off the selvage, folded it long ways a few times and ironed it down to make creases for easy cutting. I wound up with 8 strips of fabric which was more than enough. Anyhow, I took one strip of fabric and hot glued the ends on each side of the basket.

Next I took the middle of the strip and hot glued it to the middle of the basket.

Then I kept doing the same thing. For each loop of fabric, I would find the center of the basket and glue it down. (I hope this make sense! Hopefully the pictures will help.)

I continued doing this until this was the end result. I did this on both sides of the basket.

I went around with my hot glue gun and just secured some of the open spots. As you get further and further along with the ruffles, the loops get smaller so it’s hard to get the glue in there sometimes. I trimmed the fabric ruffle down a bit to make it shorter (shown in completed project photos).
After I had this part completed I realized that I needed to finish that edge off a bit. It looked too rough even though I was going with the frayed look with the canvas. I took my left over strips of fabric and folded a small edge down and ironed flat. Cutting one strip in half gives you enough for both sides of the basket.

With the folded edge on the outside of the basket I glued it down all the way around, folded the rough edge over to the inside of the basket and glued that down. I really should have folded both edges down so that the inside of the basket looks finished too but I was running out of time (again!) and just wanted to finish it.

I am really happy with how they came out. I plan on using them for my girls Halloween baskets but thought that they would make a really cute bread basket during the holidays. Just toss a napkin inside and you are good to go. 🙂
I am linking up to The Idea Room, Tatertots and Jello Weekend Wrap Up Party, The Shabby Nest, Fingerprints on the Fridge and Whipperberry.
XOXO
Diana
www.thegirlcreative.com
Wow super cute idea! I need to get myself a glue gun haha!
So adorable! I love that technique to get the messy pleats! Thanks for sharing.
That is really cute! Love the pleated look!
Very cute basket! I thought I was the only one out there who doesn’t do Halloween. My kids are too little to think they’re missing anything–for now!
I love the basket – that is a great idea for year round or organizing hair things, etc. I keep debating the whole Halloween thing – what once was cute not just annoys me as my neighbors make graveyards in their front yards – maybe I am getting old!
Love this!!! I am so stealing your ruffling trick! You have just inspired me to get to work on a project I have been procrastinating on! thanks!!
I’m Your newest follower too 😉
These are so stinkin’ cute!!!! I have tons of these baskets in my garage (left over from my classroom) and now I know what to do with them!!! Thank you so much for sharing! I’m off to go find those baskets in the black hole that is my garage!