If you ever wanted to know How to Customize and Edit a PDF then you’re in luck because I’m going to show you just how easy it is.
I’m kind of embarrassed to admit this since I’ve been creating printables for years now but I JUST learned that you can edit PDF’s. I mean I knew there was a way but it always seemed too difficult and involved for me to understand. But guys. It’s so simple and I’m excited to share with this tutorial with you.
For this I’ll be using Foxit Reader. Foxit Reader is my PDF viewer of choice. I’ve found it be very user friendly and I prefer it over Adobe Acrobat Reader. Foxit Reader is FREE and you can download it by clicking HERE.
How to Customize and Edit a PDF
The first thing you’ll want to do is open the file that you want to customize. For this video I am using a FREE Unicorn birthday party invitation that you can grab on my blog.
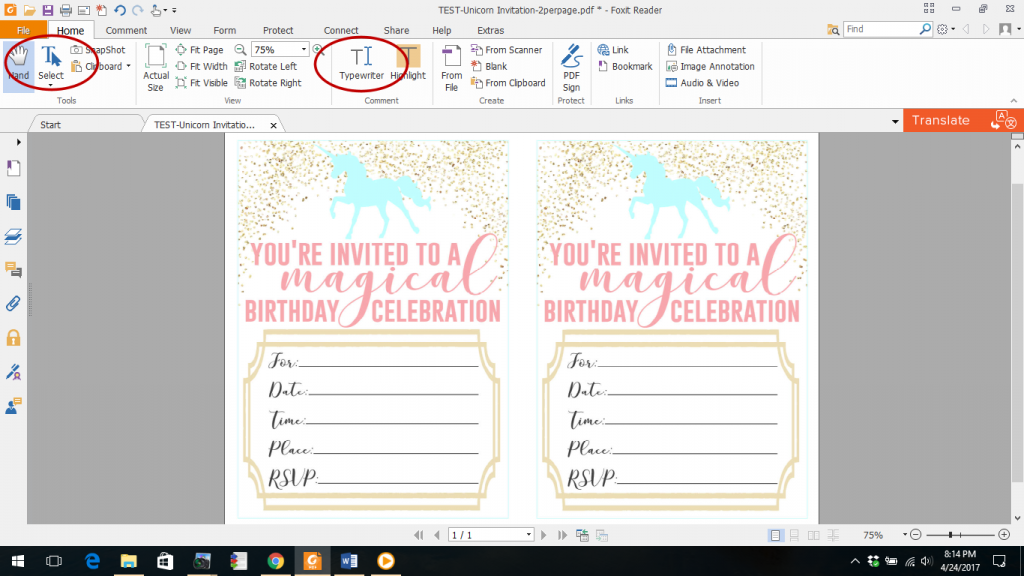
Now that you have your file open, it’s time to customize it. In the top left corner you’ll see a T with an arrow and the word “select” under it. Click on that. Next you’ll click on the Typewriter icon in the toolbar up top.
Next you will click wherever you want your custom text to appear.
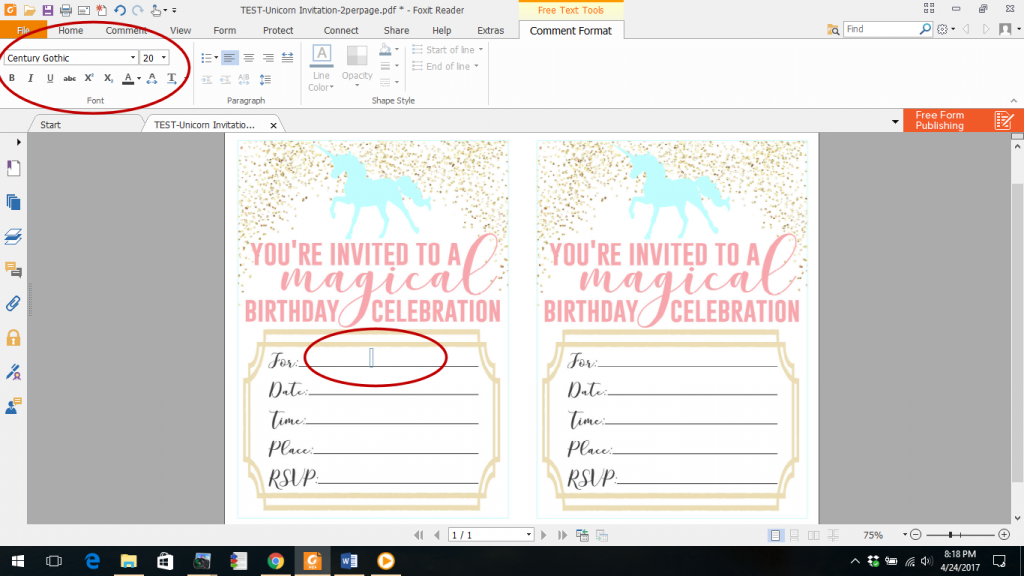
Once you do that you’ll see in the top left hand corner a place to change the font, font size and font color. Once you have made your changes, you can start typing.
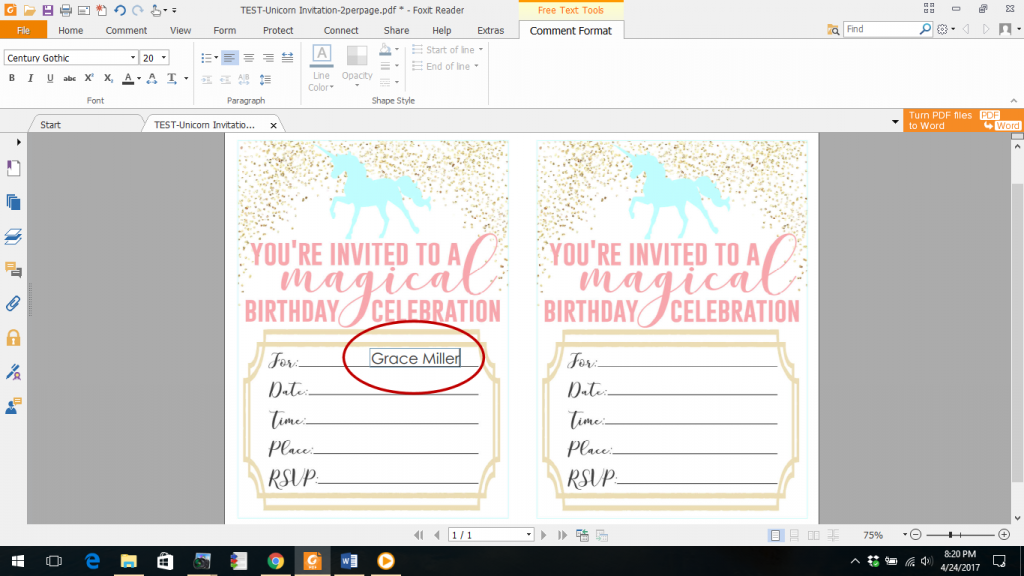
After you’ve typed the text you want you, click the corner of that text and a light box should appear around your text. You should also see a grey box right above that that shows an A+ and an A-. You can click on either one of those to make your text bigger or smaller.
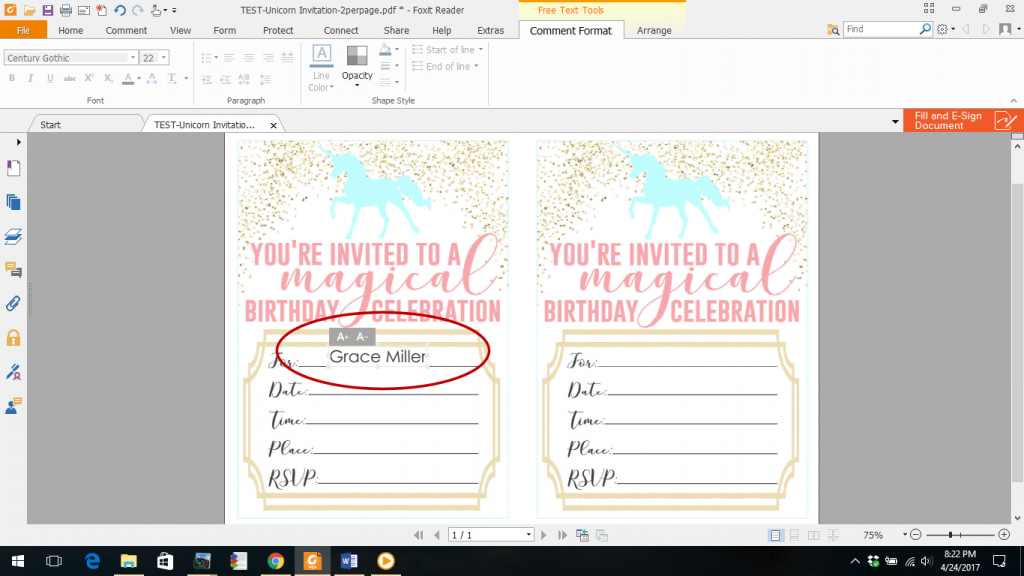
Once you have it at the desired size, you’ll continue on using the same process to customize the rest of your PDF. Feel free to go back and make sure you have your text aligned the way you want. To move text around just click on it and drag.
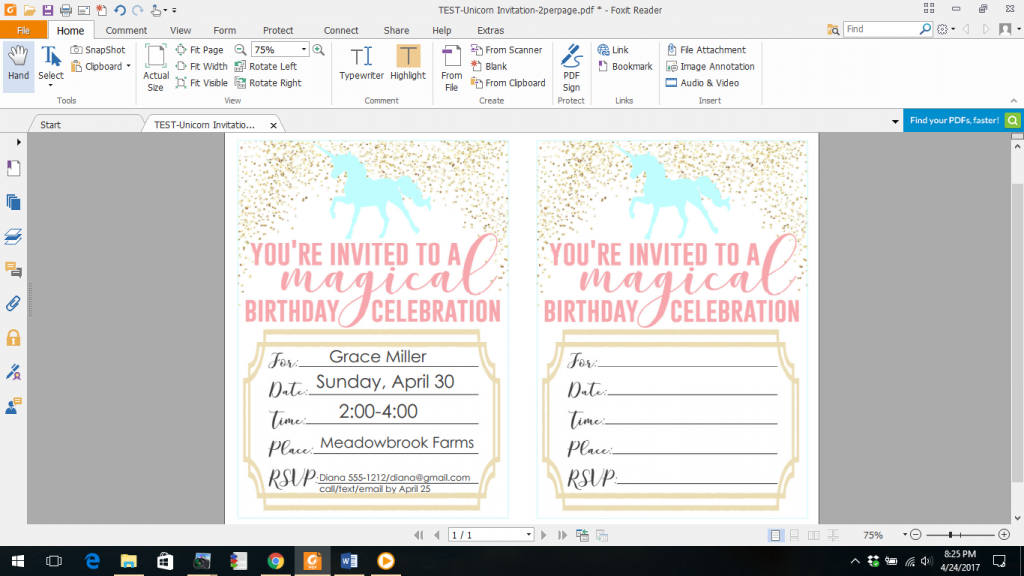
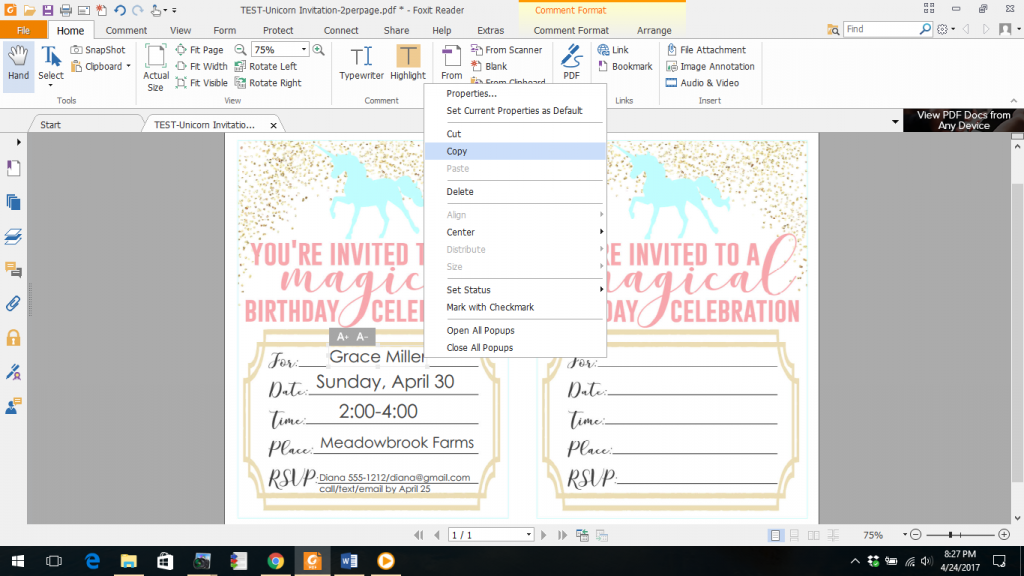
If you are working on an invitation like this where you have 2 per page you’ll need to copy and paste the text to the blank invite. All you need to do is right click on the text that you want to copy and click “COPY”.
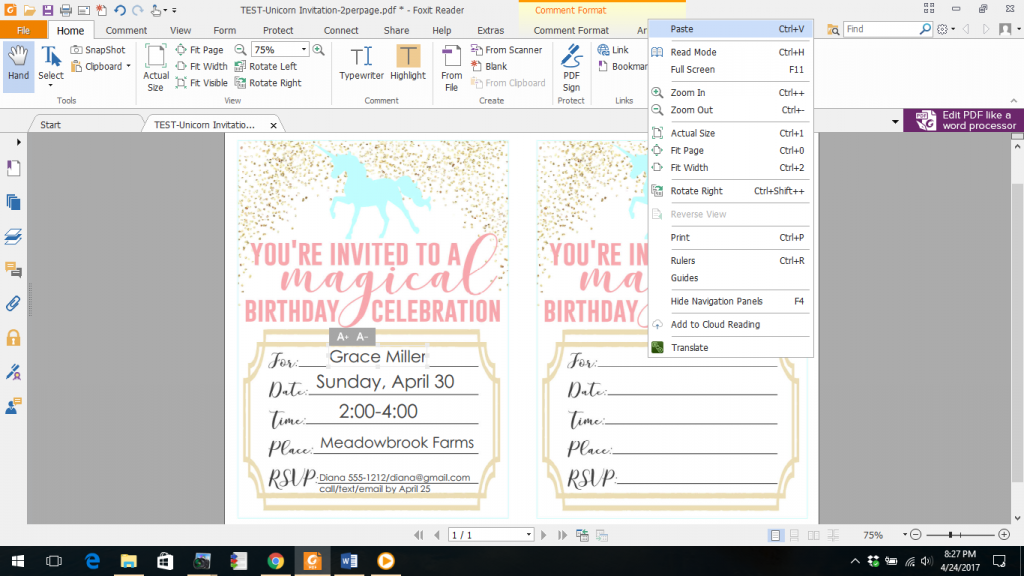
Then you want to RIGHT click where you want the copied text to appear and choose “PASTE”.
Continue doing this until you have everything exactly where you want it.
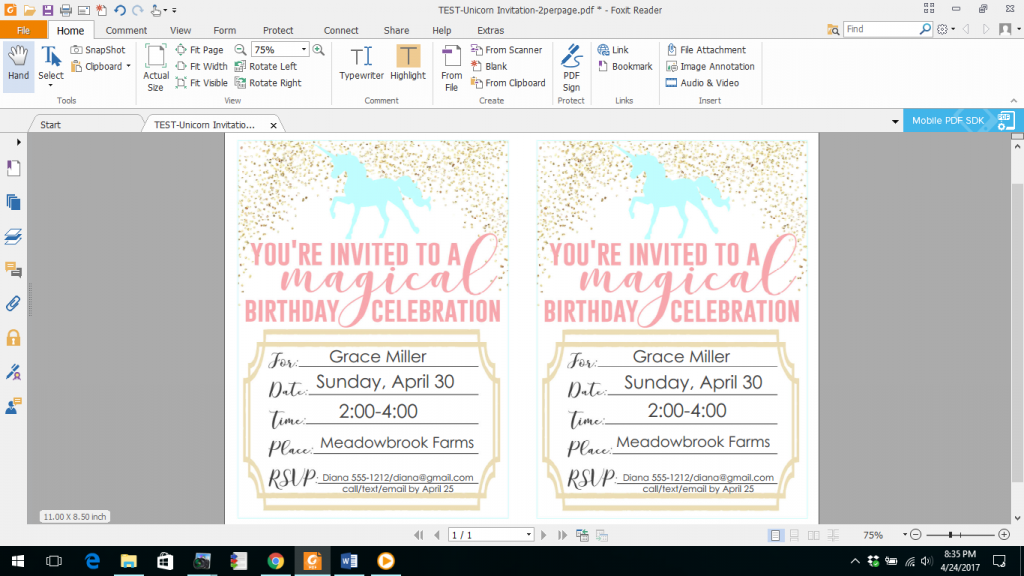
If you need to re-position any of the text just click on it and drag. Super simple!
Once you are done go ahead and save your file. I recommend using “SAVE AS” and giving it a new name. This will ensure that you keep your blank copy as well as the completed copy, just in case.
Now you are all set to print your document.
Side Note: If you notice you made a mistake AFTER you printed it out, you can just open your saved file (if you’ve closed out already)and make edits. You can do this by double clicking on the desired text, clicking Control+A to highlight that text and retype it. Don’t forget to SAVE your changes.
Told you it was simple!
