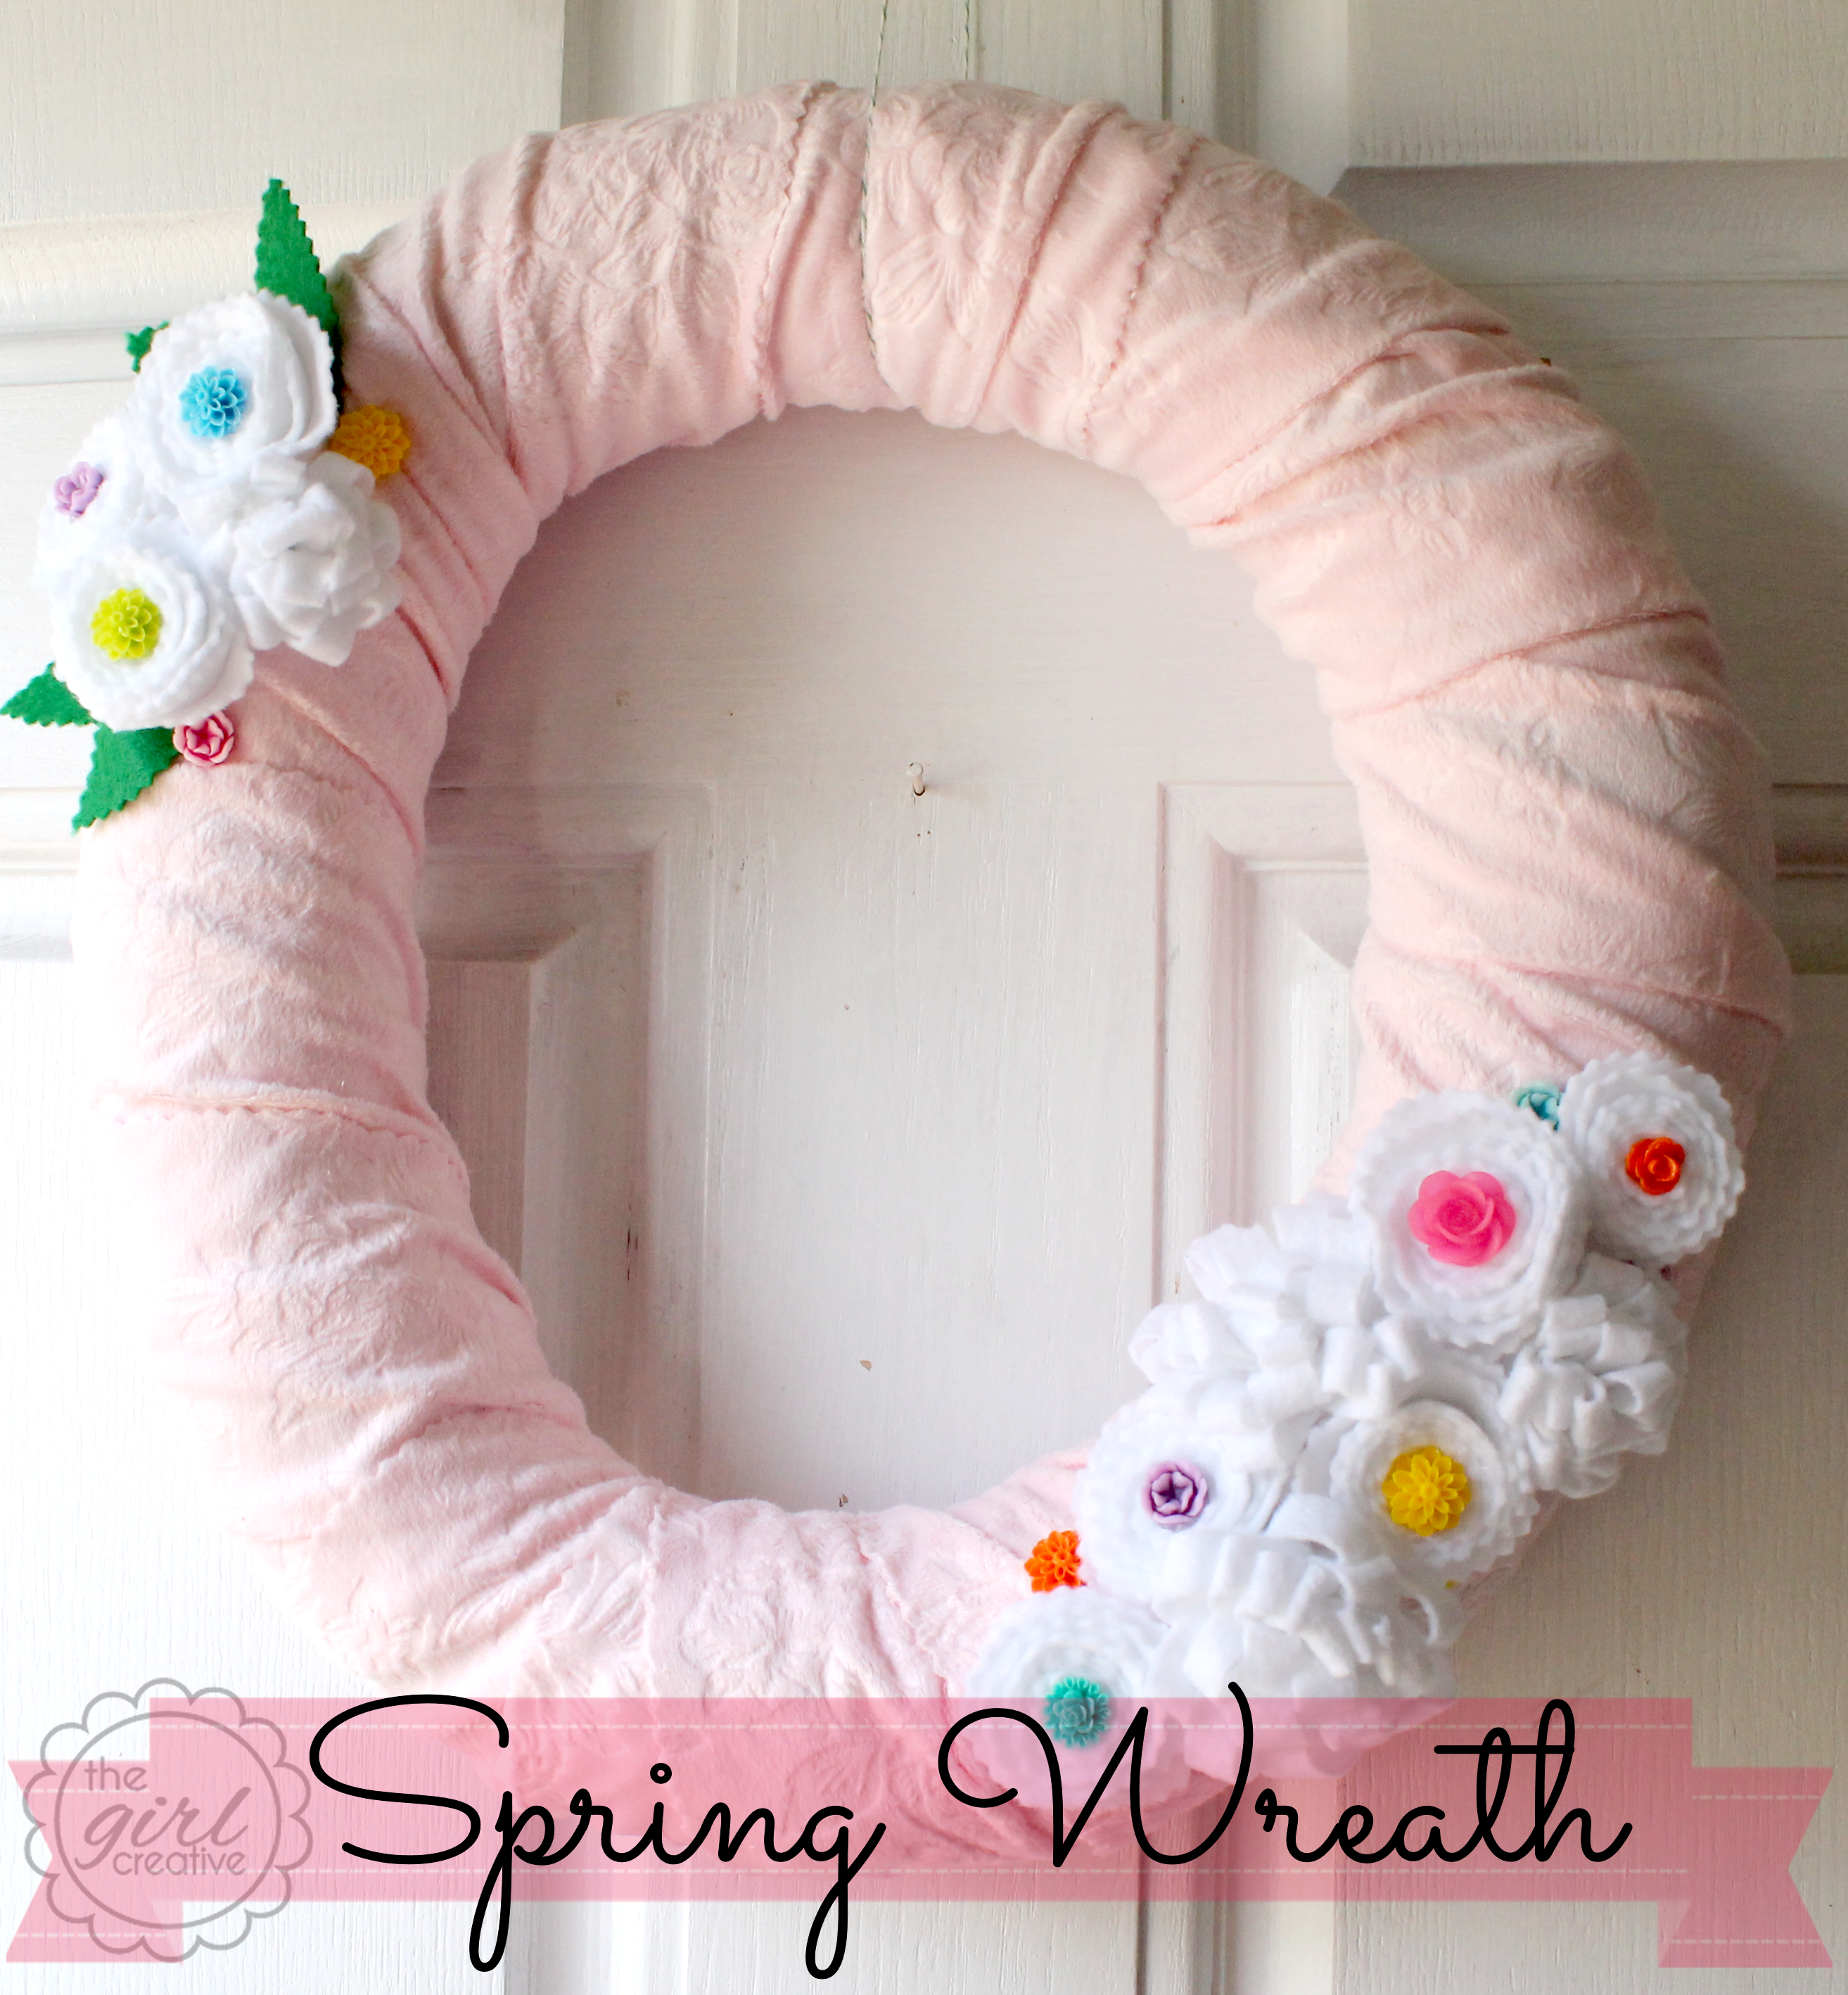
Spring Wreath with Felt Rosettes and Cabochans
Spring wreaths are everywhere and while I’m sure this is very similar to many that you’ve already seen, here my take on it. May I introduce you to the spring wreath with felt rosettes and cabochans! If you don’t know what cabochans are, they are those little plastic flowery thing you see on the picture below. I had gotten a bunch from such a sweet blogger, Andrea from The Cottage Market, awhile ago and just didn’t know what to do with it them until I was finishing up this wreath and knew it would be the perfect finishing touch for it.
In my typical, unorganized, chaos-living, 2 year old chasin’ fashion, I didn’t take any progress pictures. BUT I can tell you what I did!
I picked up a cheapy straw wreath form and kept the plastic wrapping on. I did try to cover it in layers of felt but I’m always in a rush, trying to get everything done quick before my son does a number on my house so I went with wrapping it in strips of the only spring-like fabric I could find: pink minky! It took a few minutes to cut my fabric in thick strips (about 6 inches wide) and then secured the ends with hot glue.
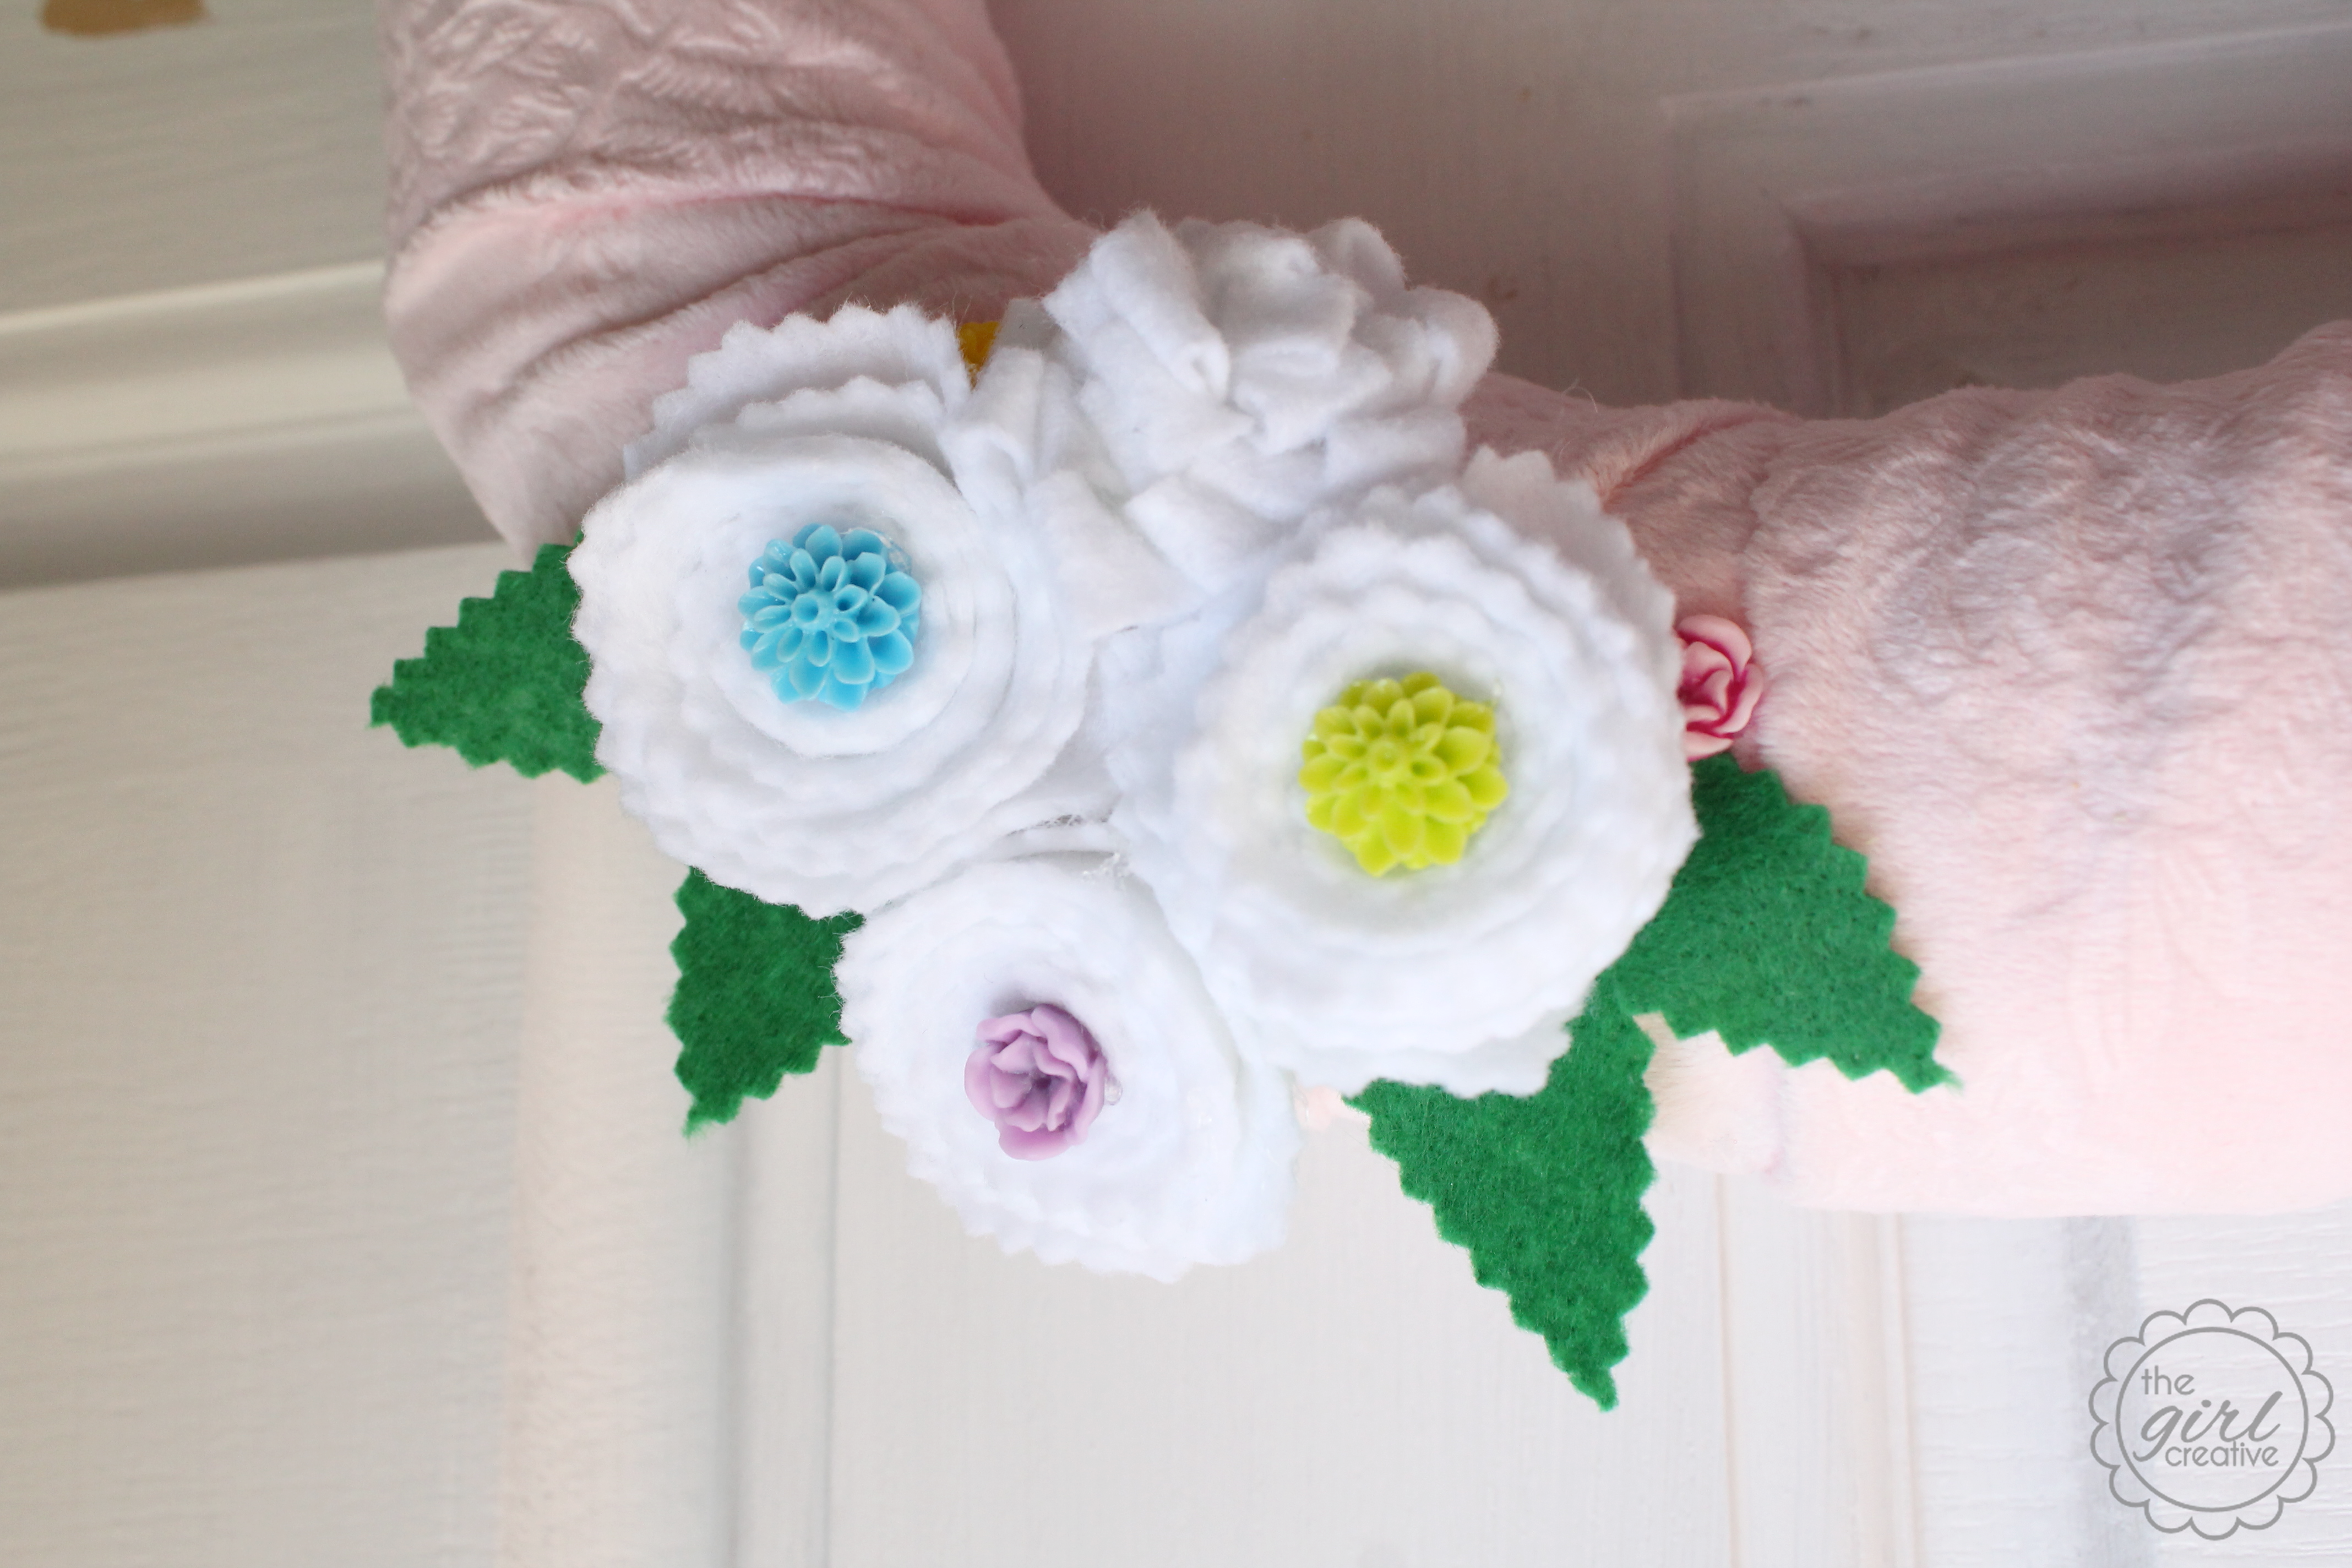
I took some white felt and made a bunch of felt flowers. I made a few rosettes using my pinking shears to give the edges some texture. (Thanks Ashley from Simply Designing for that little tip!) I also made a few felt chrysanthemum flowers just to change it up a bit. I used my hot glue gun to glue them on and used my pinking shears to create a few green leaves from green felt I had in my stash.
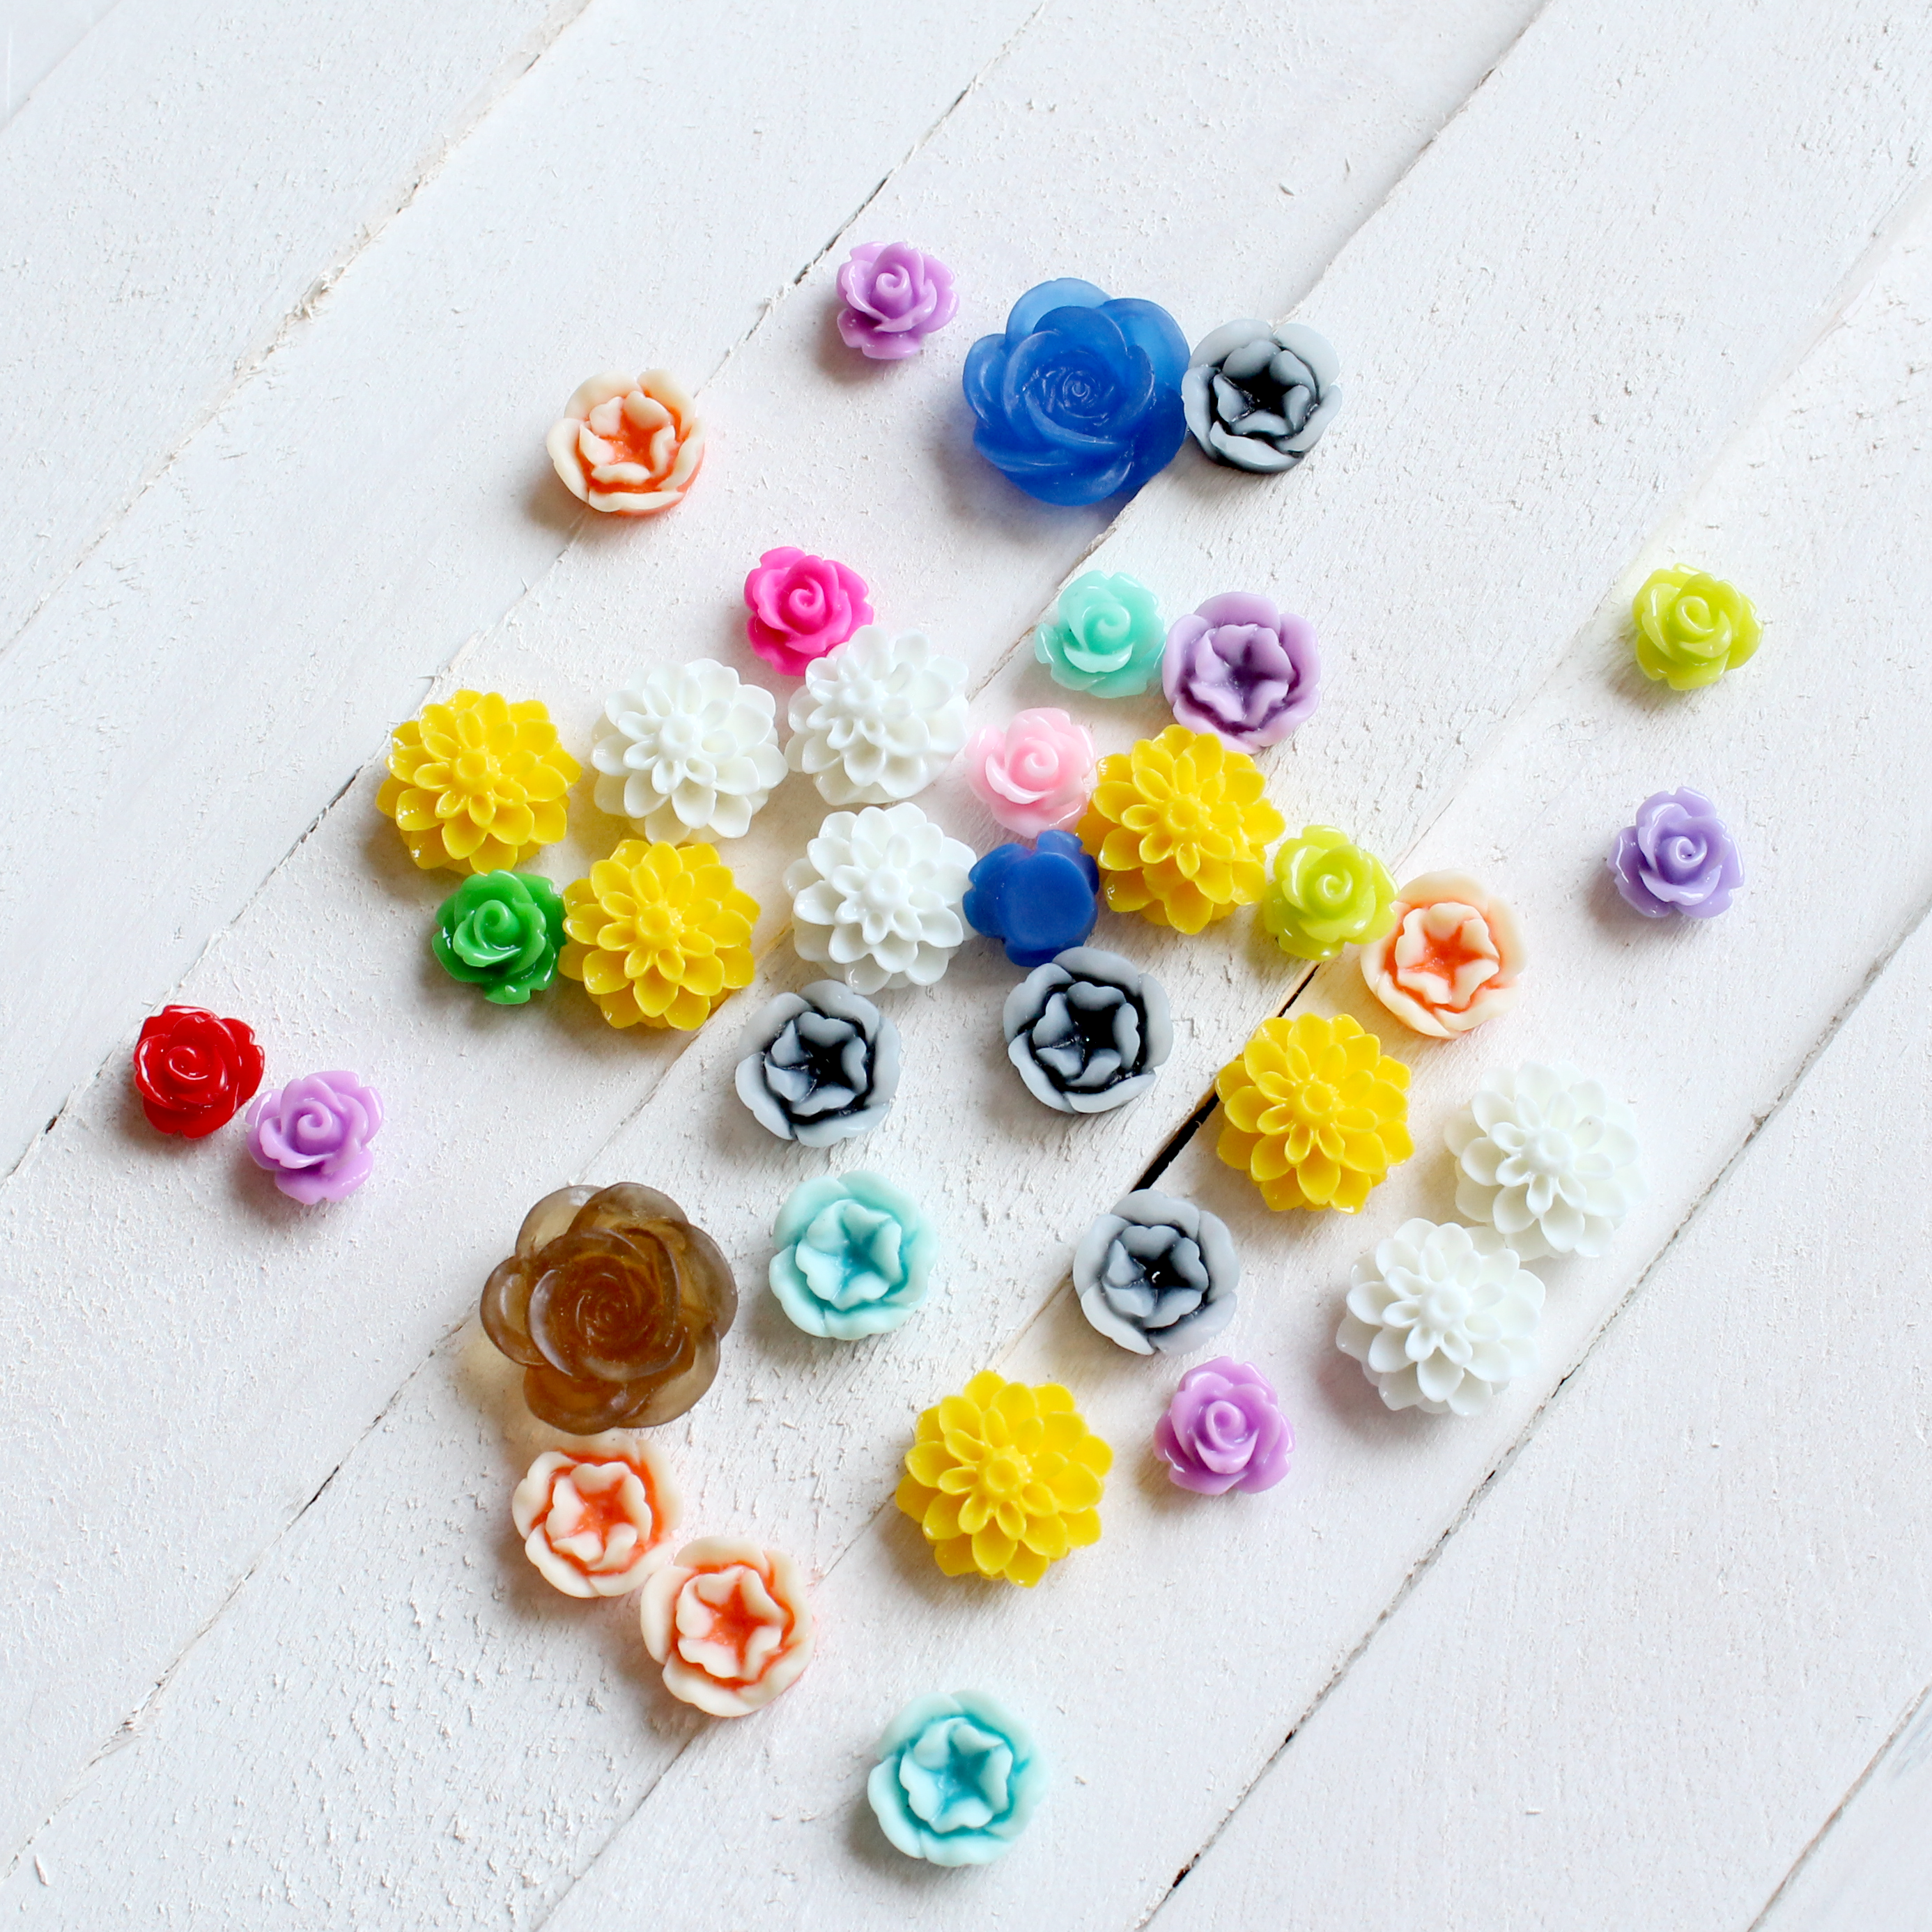
I loved how the flowers turned out and how it they all looked on the wreath but it was just looking so plain to me. Then I remembered these cabochans I had in my stash that I was wondering what I could use them for and decided this was the perfect project. I hot glued random colors in the center of my rosettes.
This little change just really brightened up the whole wreath!
This is a craft that you could bang out during nap time.
HERE’S A TIP FOR HOW TO HANG IT ON YOUR DOOR
I took some bakers twine and strung it through the top of the wreath and tied the 2 ends together. You’ll want to make it pretty long and I’ll tell you why. I attached a clear hook upside down to the back of my door. I hung the wreath on the front of my door and brought my string over the top of the door and looped it right under the clear hook. You might have to play around with the length of the string a bit until you get your wreath in the right place.
***
Mother’s day is just around the corner…….here’s a sweet collection of FREE Mother’s Day Printables for you to check out!
I adore your wreath. It is so feminine and pretty.
Cute wreath!!!