DIY Christmas Countdown Sign
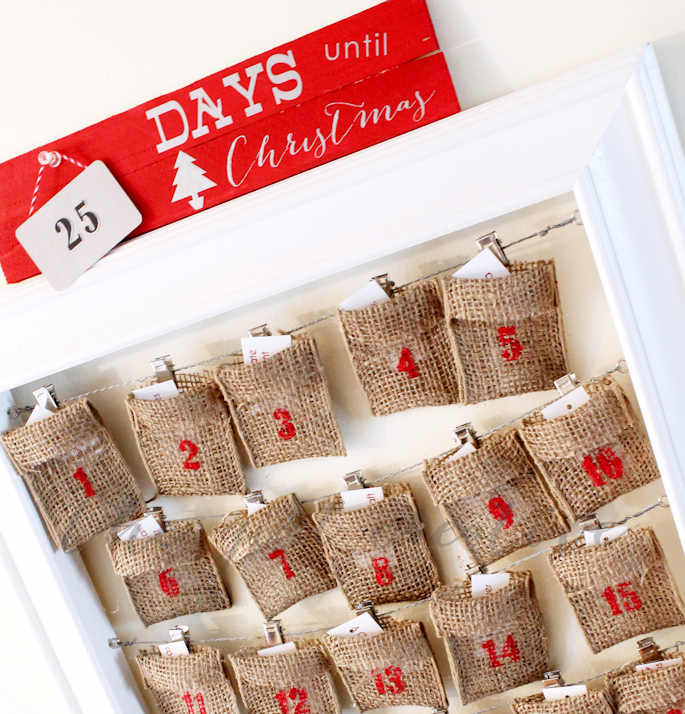
When I was making my Burlap Ribbon Advent Calendar I felt like there was just something missing but I just didn’t know what. I use a frame that I got from Silhouette that’s hanging on my wall but I always felt like it was a little plain. Like it needed a little something more. Well, I came up with this adorable DIY Christmas Countdown Sign and I think it was the perfect fix to my problem.
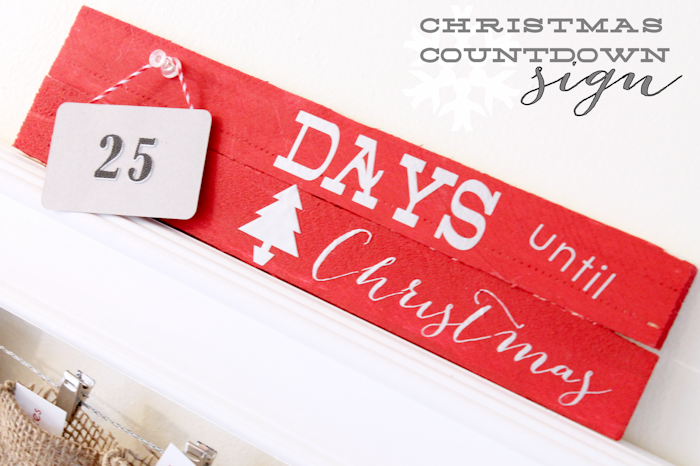
I had just gotten some festive silver vinyl from Silhouette that I was itching to use and it was perfect for this project. This project was very simple but it was a tiny bit time consuming because I had quite a few cuts to do with my cameo but it was well worth it.
Supply List
2 wood shims
craft paint
vinyl
wood glue
push pin
Silhouette chipboard
Silhouette Adhesive Canvas (I LOVE this stuff!)
bakers twine
hot glue gun
Step One: Glue 2 wood shims together with wood glue and let dry.
Step Two: Paint shims with craft paint and allow to dry.
Step Three: Create a design with your Cameo or Portrait and cut out using vinyl.
(The fonts used in my project were “DAYS” – silverfake, “UNTIL” – century gothic, “CHRISTMAS” – bombshell pro)
Step Four: After your design is cut out, peel away the vinyl surrounding your letters and design. You will want to leave those on the vinyl backing.
Step Five: Take clear contact paper (or transfer tape if you have any) and place over your design. Smooth the contact paper down over your design with a credit card. You will want to go over it a few times to make sure the contact paper sticks to the vinyl.
Step Six: Peel your contact paper back and your vinyl design should now be stuck to it.
Step Seven: Position your design on your painted shims and smooth down with credit card. Once you do that, slowly peel the contact paper off. IMPORTANT NOTE: If you find that your vinyl is not sticking to the wood, lay it back down and smooth over again. I had to do this a few times as I went along until the whole design had transferred onto the shims.
Step Eight: Create a number set with your Silhouette software. Use the print and cut feature to print the numbers out onto the Adhesive canvas and then feed back into your machine to cut out. (If you have never used this feature, I highly recommend googling instructions and watching a few tutorials on You Tube. You will be glad you did because sometimes this can be tricky.)
Step Nine: Create 25 rounded rectangles and cut out using Silhouette chipboard.
Step Ten: Once all of your numbers and rectangles are cut out, stick a number on each rectangle.
Step Eleven: Grab your hot glue gun and start gluing little strands of bakers twine onto the back of each rectangle. This will now turn your numbered rectangles into hanging signs.
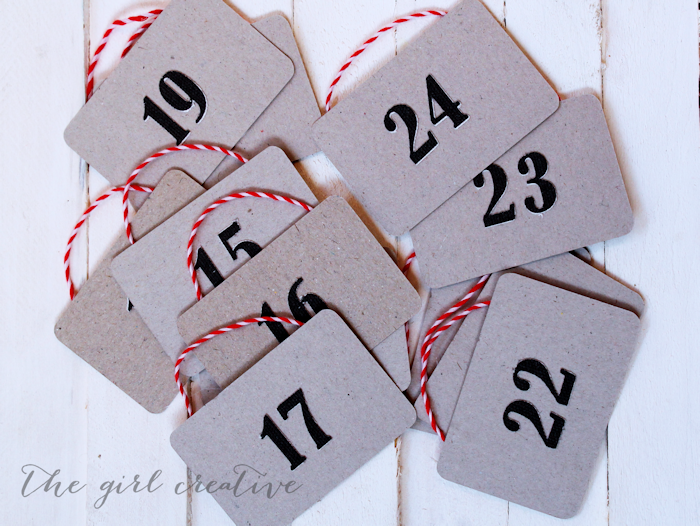 Once you have everything done, push a push pin into your shim sign and hang your number on it. I keep my numbered tags in a bag in my kitchen and everyday I just change it out.
Here it is sitting on top of the advent calendar.
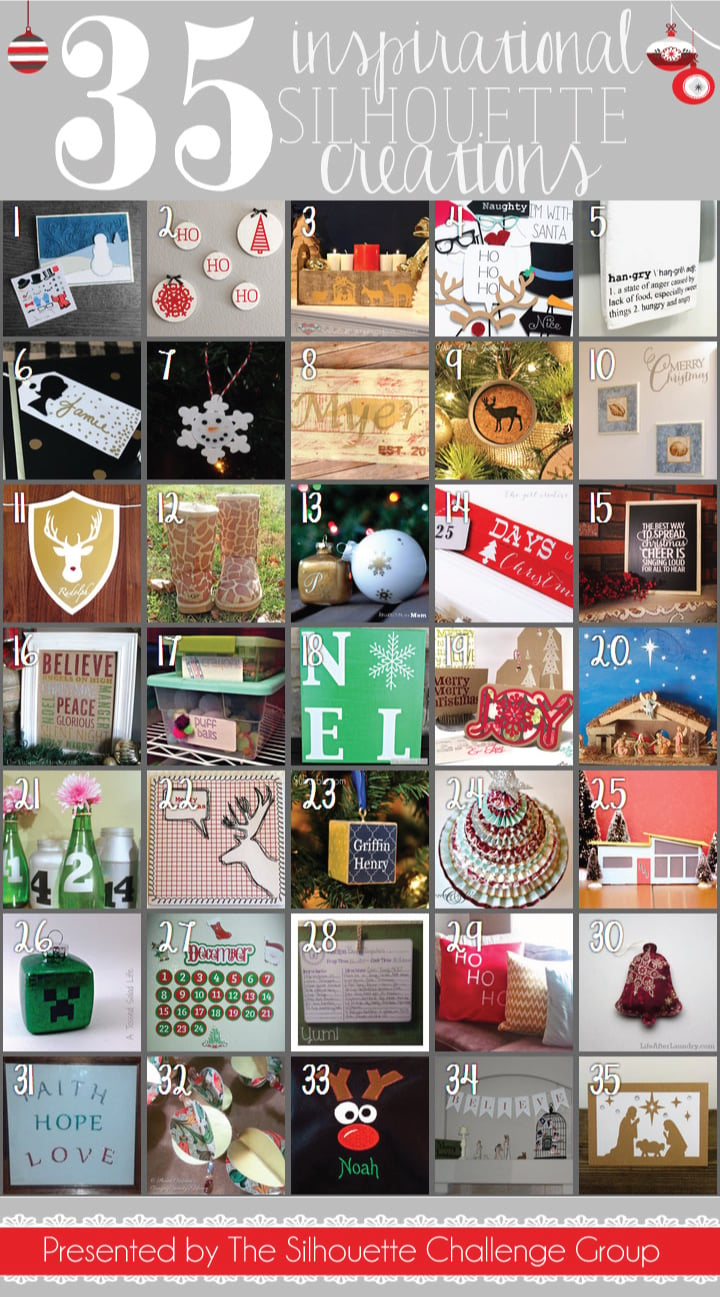
Want to Check Out More Silhouette Projects?
My Silhouette Challenge buddies and I are all sharing projects on our blogs today, so peruse the projects below for a wealth of Silhouette inspiration!
- 2013 Snowman Christmas Card by Please Excuse My Craftermath…
- Christmas Hoop Art by Lil’ Mrs. Tori
- Silhouette Nativity Advent Candle Box by One Tough Mother
- Christmas Party Photo Booth Props by unOriginal Mom
- Another Stenciled Tea Towel by Cutesy Crafts
- Silhouette Gift Tags by Rain on a Tin Roof
- Snowflake Pin / Ornament by Coley’s Corner
- State Sign Couple Gift by It Happens in a Blink
- Mason Jar Christmas Ornaments by Vintage News Junkie
- Merry Christmas Wall Decor by One Artsy Mama
- Deer Head Holiday Banner…featuring Santa’s Reindeer by The Thinking Closet
- Restore your UGGS (with PAINT) by From Wine to Whine
- Monogrammed Snowflake Ornaments by Architecture of a Mom
- Christmas Countdown Sign by The Girl Creative
- Elf Chalk Sign: “The Best Way to Spread Christmas” by Weekend Craft
- Glittery Christmas Subway Art by The Turquoise Home
- Sketch Pen Labels by Sowdering About in Seattle
- Snowflake NOEL Sign by My Favorite Finds
- DIY Holiday Hostess Gift by Everyday Paper
- Folding Nativity Backdrop by Chicken Scratch NY
- Recycled Glass Jar Advent Calendar by Nearly Handmade
- Reindeer Card: Double-Sided Print & Cut by GetSilvered
- Personalized Block Ornament by Suburble
- Paper Medallion Christmas Tree by Create & Babble
- Mini Mid-Century Homes by Tried & True
- Glitter and Vinyl Minecraft Christmas Ornament by A Tossed Salad Life
- DIY Countdown to Christmas Refrigerator Style by My Paper Craze
- Reversible Recipe Holder/Block Frame by The Sensory Emporium
- DIY: Lettered Christmas Pillows by The House on Hillbrook
- Simply Charming Christmas Ornaments by Life After Laundry
- No Glitter was Worn by GiveMeAPaintbrush
- Make Easy Ornaments from Paper Circles by Bringing Creativity to Life
- Cutting Machine Embroidery Applique by Terri Johnson Creates
- “Believe” Christmas Banner by Daily Dwelling
- DIY Christmas Nativity Card by Pitter and Glink
Do you have a Silhouette machine?
Looking for Silhouette inspiration, support, trouble-shooting? Interested in joining us for our group posting event next month? Then, we’d love to have you join our Silhouette Challenge Facebook group. To join, simply fill out the new member request form, and Lauren from The Thinking Closet will get you squared away.


Adorable. I love your sign. Have a Merry Christmas
Thank you so much, Tanya! Merry Christmas to you! 🙂
How cute! I love the combination of silver and red. The fact that you’ve put your countdown on top of your advent calendar is so perfect!
Thank you so much, Kristy!! I thought it might be a good idea to have 2 advent type things to do since my 2 girls usually fight over who’s going to see what the daily activities are. lol 🙂
Ha! Oh yeah, that would making having to calendars not just super cute, but also practical! I hope that it’s help alleviate the fighting!
Oh wow this is GREAT!! I love that you made little removable signs, it’s an adorable touch! And paired with your advent calendar it looks absolutely perfect!!
Thank you so much, Dee!! 🙂
I think your sign really did make your Advent Calendar pop just right! What a cute addition to make the Holiday even more special!
Thank you so much, Bev!! 🙂
Love your sign! I think you were right, it really completes the look.
I will definitely be making this. So cute!
I love the sign! It looks great over the advent calendar!
Thanks, Tori!! 🙂
This is such fun! I totally want one! 🙂
Thank you, Emily! 🙂
I really love countdowns! This one is adorable!
Thanks so much, Jessica!
The countdown sign is a great idea. Looks great sitting above your advent calendar. Perfect pairing!
Thanks, Pam! I love it and it was so easy. Took some time but not hard at all…my kind of project! 😉
That is such a cute way to count down to Christmas! I love it!
Thanks for the simple inspiration for an advent calendar. We *need* one of those in my house!
Wow! People pay big bucks for signs like this one…doncha just love how the Silhouette enables regular ole crafters like us to pull off the professional quality in our diy projects now?! Great work. Also, those little burlap envelopes on your advent calendar have me swooning! Definitely pinning this!
Thanks so much for participating in our December Challenge! You are such an asset to our group!
Totes adorbs! And I love that Advent calendar too!
Super cute Diana!!
This is super cute!!! I really love it!