DIY Lemonade Stand
Learn how to make this DIY Lemonade Stand with just a few wooden crates and some scrap wood!

Every single summer my girls ask me if they can have a lemonade stand. While I love the idea of it, for some reason I always come up with some reason why they can’t. Well, this year with every intention of finally making it happen, I put “Lemonade Stand” on our summer bucket list. There. It’s in writing. Now I HAVE to do it! And while I’m FULLY aware that they would be happy with just a table and some chairs out on the front lawn, I really wanted to build a stand for them to use………….and so I finally did!
DIY Lemonade Stand
DIY Lemonade Stand Supply List
My Supply List
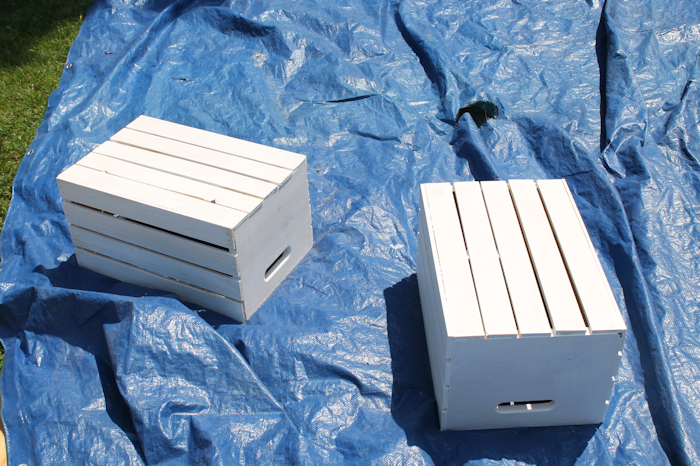
4 wooden crates
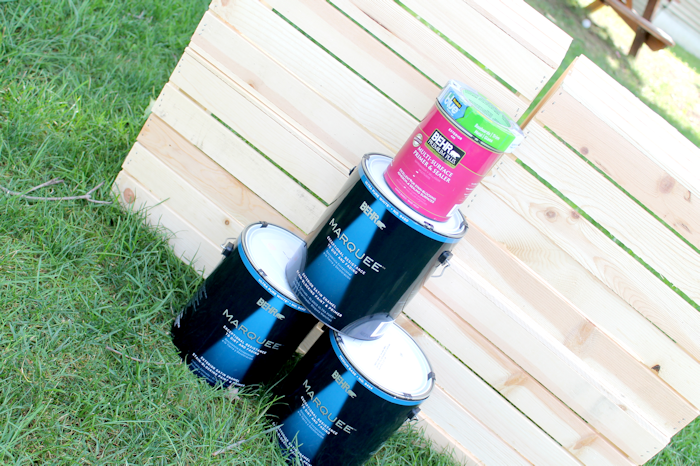
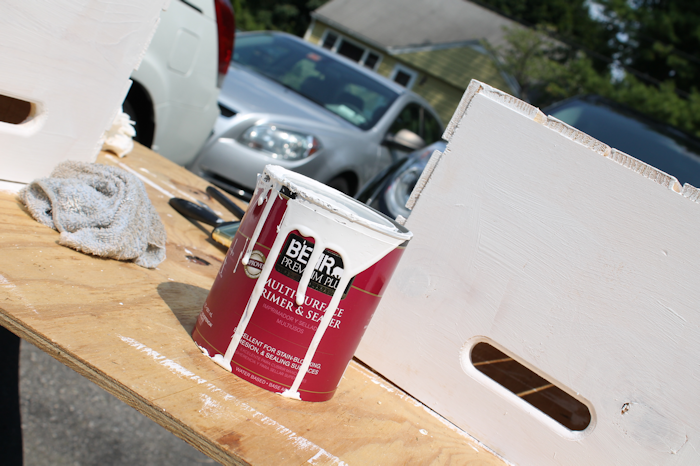
Behr® Premium Plus® Exterior Multi-Surface Primer & Sealer
Behr® Marquee™ Paint in Pink Parfait 170A-1, Daffodil Yellow 380B-4 and Ultra Pure White PPU18-6
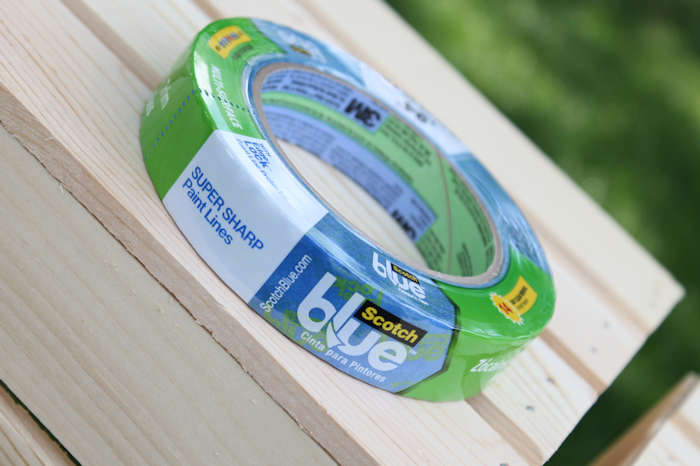
ScotchBlue™ Painter’s Tape Multi-Surface with Edge-Lock™ Paint Line Protector 2093EL
Wooster® Paint Brushes
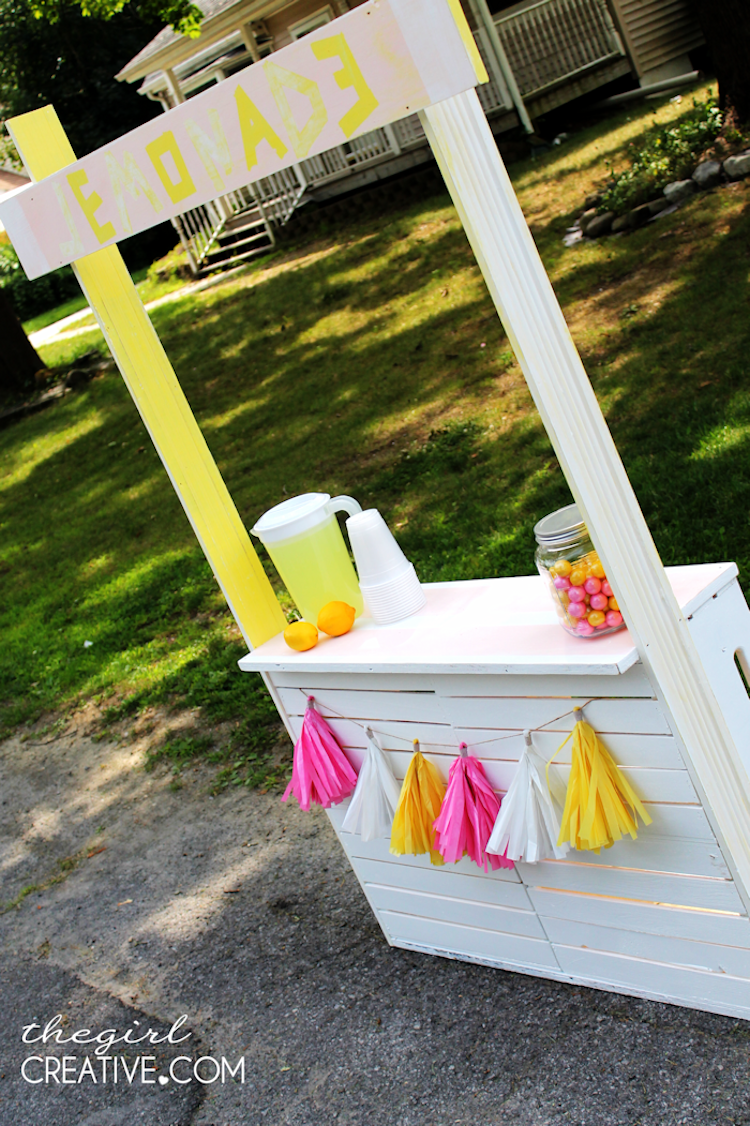
2 pieces of rigged door trim (we had this laying around but you can easily use a 1×6 for this)
Wood for “Lemonade” sign
Plywood
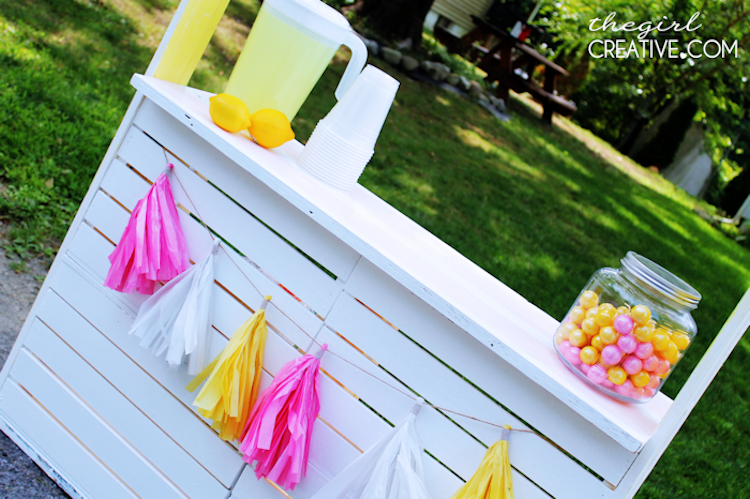
We started out by laying our crates out the way we felt best. I had a few different ideas that I wanted to try out but we wound up going with laying them out long ways and stacking them on top of each other.
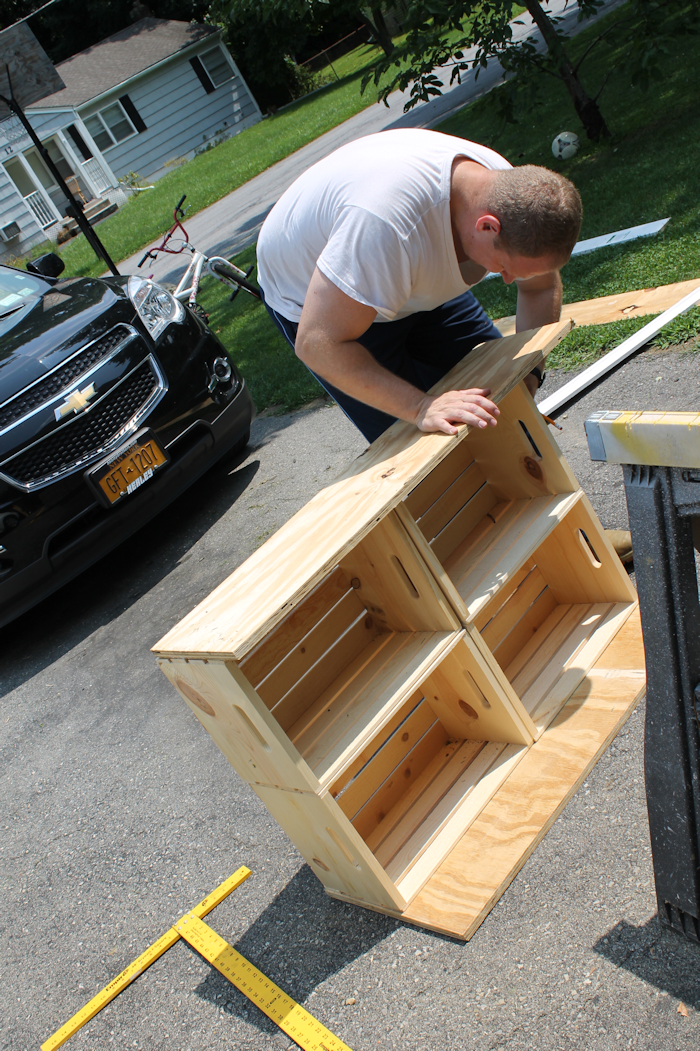
Once our crates were laid out we figured out what size shelf and base we wanted and cut some plywood that we had laying around accordingly. We then primed and painted all of our pieces.
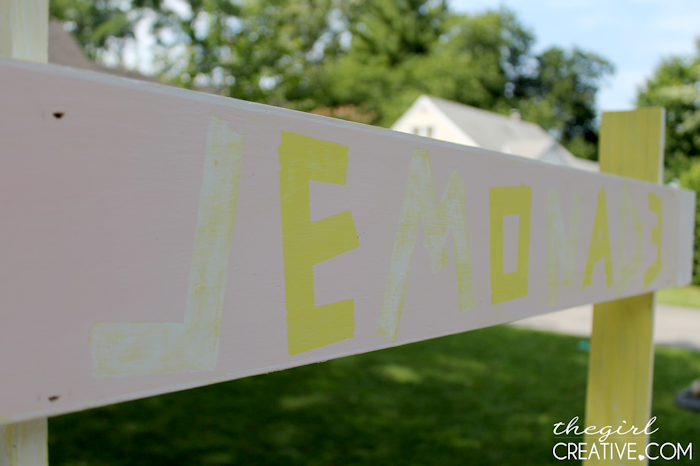
I thought it would be easier to assemble the lemonade stand first and then paint it but my husband had other plans. So, while the crates were drying, I grabbed the ScotchBlue™ Painter’s Tape and created the word “lemonade” on a piece of scrap wood that I had laying around. We painted the wood in Behr® Daffodil Yellow paint before we taped out the word lemonade.


Once I had my letters all taped out, I painted right over the ScotchBlue™ Painter’s Tape with Behr® Pink Parfait. After the pink paint was dry, I removed the tape which now left me with a pink sign and yellow letters.
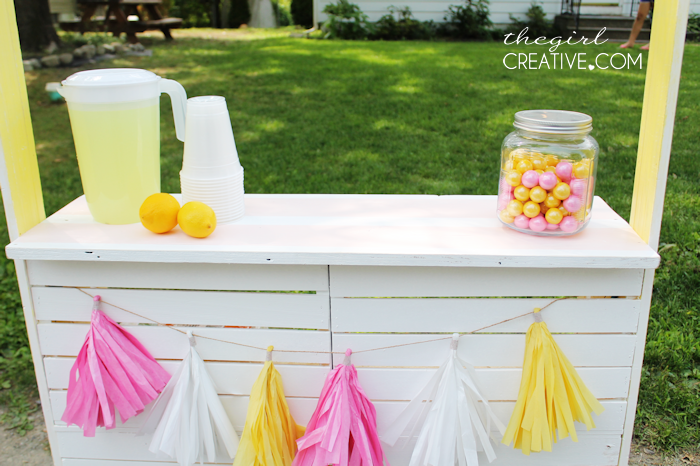
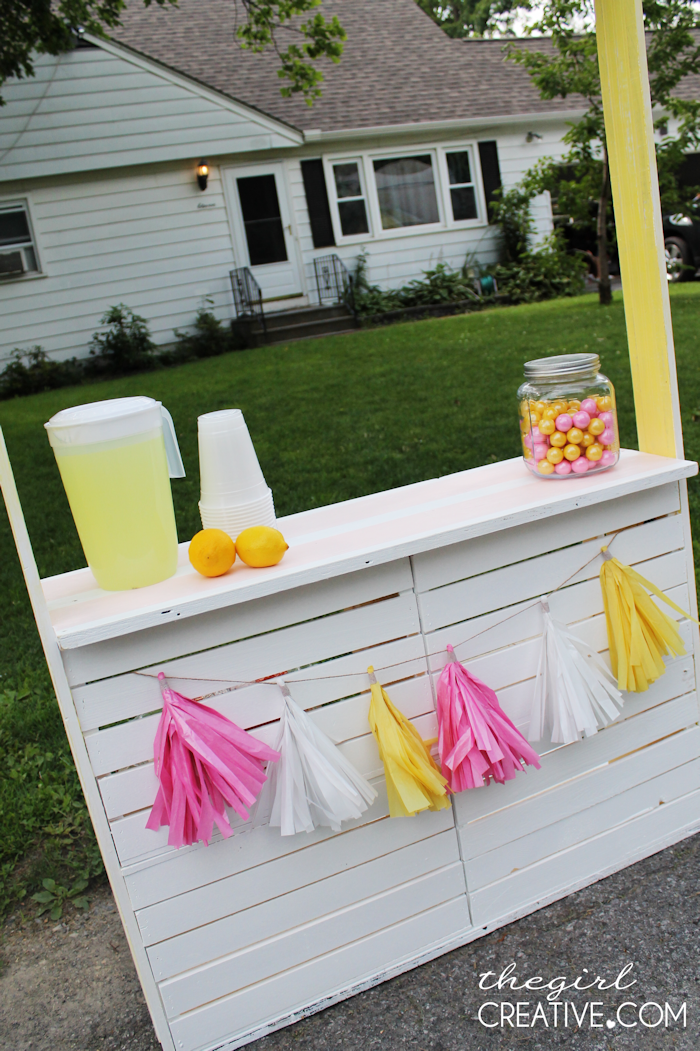
Now that all of our pieces were painted and dry, we assembled the lemonade stand by nailing the 2 bottom crates to the plywood base using our nail gun. We then nailed the 2 top crates to the bottom crates and nailed the shelf on. We took our 2 pieces of door trim (painted in Behr® Daffodil Yellow) and nailed it to the sides of our crates so that our lemonade sign would have something to hang on.
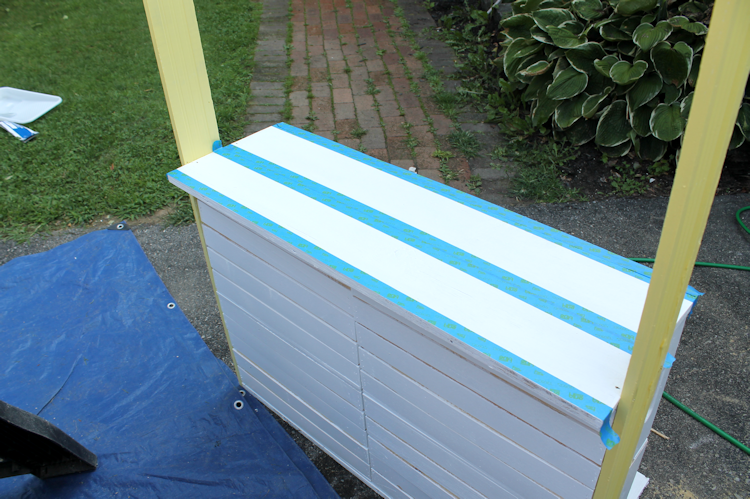
Wanting to give the stand a little more of the Behr ®Parfait Pink color, we used the ScotchBlue™ Painter’s Tape and created stripes on the shelf.
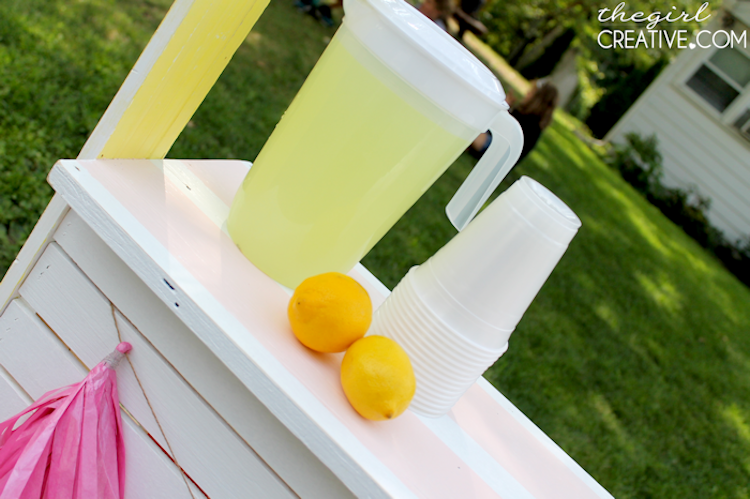
To finish off the stand, I created some fun tassel garland from tissue paper.
Ready for some picture overload!?!
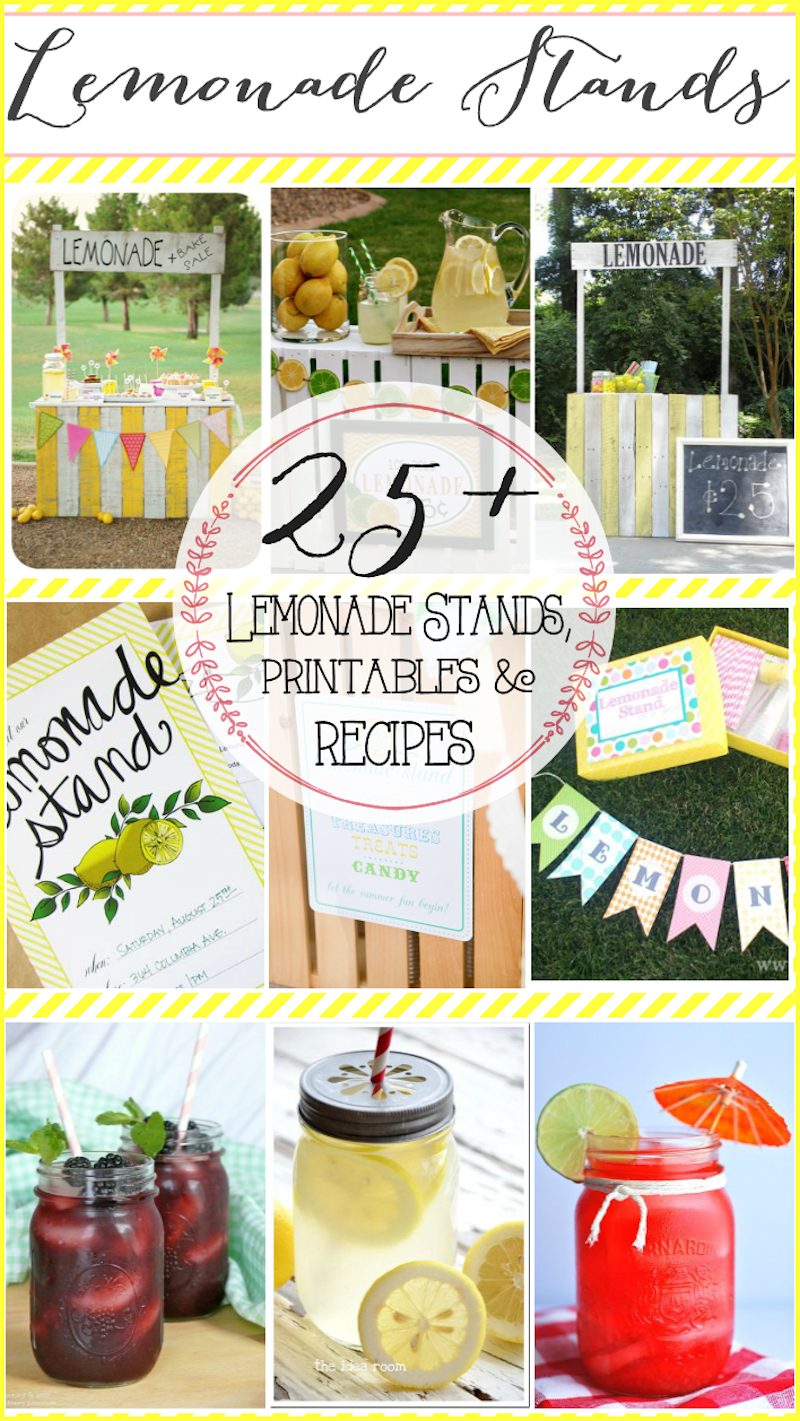
Looking for more DIY Lemonade Stand Ideas, check out this post! It’s loaded with ideas for stands, printables and homemade lemonade recipes!


The link you have above to join the The Home Depot Consumer Program just takes me back to this giveaway.
It should be all fixed now. 🙂
This may just be the cutest lemonade stand EVER! You are a genius for creating it with crates!
Thanks so much, Jenna!! I saw the idea awhile ago but made a few changes. 🙂
So cute! I bet they love their little lemonade stand and use it all the time – lemonade or none.
They do love it!! We even used it as a check in table for a BBQ we just had for Labor Day. 🙂
so smart to use the crates, so that you have shelving behind now! It’s adorable and I bet all the neighborhood kids love it!
It was a big hit! We even sold gumballs and ring pops! 🙂
Love it! What a great idea to use the crates 🙂
This is THE cutest!!
This is adorable! Pinning!
This is just SO SO cute! I love the idea of using the crates. Great job!
Thank you so much, Taryn!!! XO
Oh my gosh this is soooo cute! I love how you used the crates too!! So creative!
This is ADORABLE! My kids would adore this!
Thank you so much, Sharon!!! XO
The Rafflecopter box does not say what to put in box to enter and do not find the program when I click on it.
The link is in the blog post right above the Rafflecopter widget not in the actual widget itself.
This is adorable!! Everything turned out great!
Adorable! SO smart to use the crates.
This stand is very cute!
SO fun!! I used to love setting up a stand when I was a kid… We live in a big city now, not sure my kids will ever get this experience… love your stand!
LOVE this!! Great tutorial too.
Love this! Planning on using this idea for a photo booth I’m building this weekend. What were the dimensions of the crates that you used?
I’m not sure as this was a few years ago but they were just the standard size crates you can buy in Michaels or Home Depot. 🙂
How did you make the tissue paper tassels?
I followed a tutorial but in a nutshell this is how: I took a piece of tissue paper and folded it in half long ways. I then cut fringes from the open side up to the folded side but not cutting all the way through. I left about an inch. Once I cut the whole folded sheet, I opened it up and then rolled it from top to bottom. So, you’ll have a space in the center that has not cuts in it and you’ll have the fringes on both sides. Roll all the way to the end and then fold the rolled tissue paper in half over a string and twist a few times to secure. You can also add a cute piece of washi tape to really secure the twist. I hope you were able to understand these instructions. 🙂 Good luck!
How big were the dimensions of each crate that you used?
I’m not sure but they are just the standard size crates you can get from a craft store or even Home Depot.